If you’ve ever scrolled through Pinterest or Instagram and felt a pang of envy looking at those stunning gallery walls — the ones that look like they were curated by a high-end interior designer — you’re not alone. The good news? That luxurious, editorial look doesn’t require a decorator’s budget or a trip to an upscale frame shop. With the right strategy, a creative eye, and a few smart shopping tricks, you can create a gallery wall that looks like it cost thousands — for well under $150.
As an interior designer who has worked with clients ranging from Manhattan apartments to suburban homes in the Midwest, I can tell you one thing with absolute certainty: a beautiful gallery wall is about intention, not price tags. Let me walk you through everything you need to know to pull it off.
What Is a Gallery Wall (And Why Every Home Needs One)?
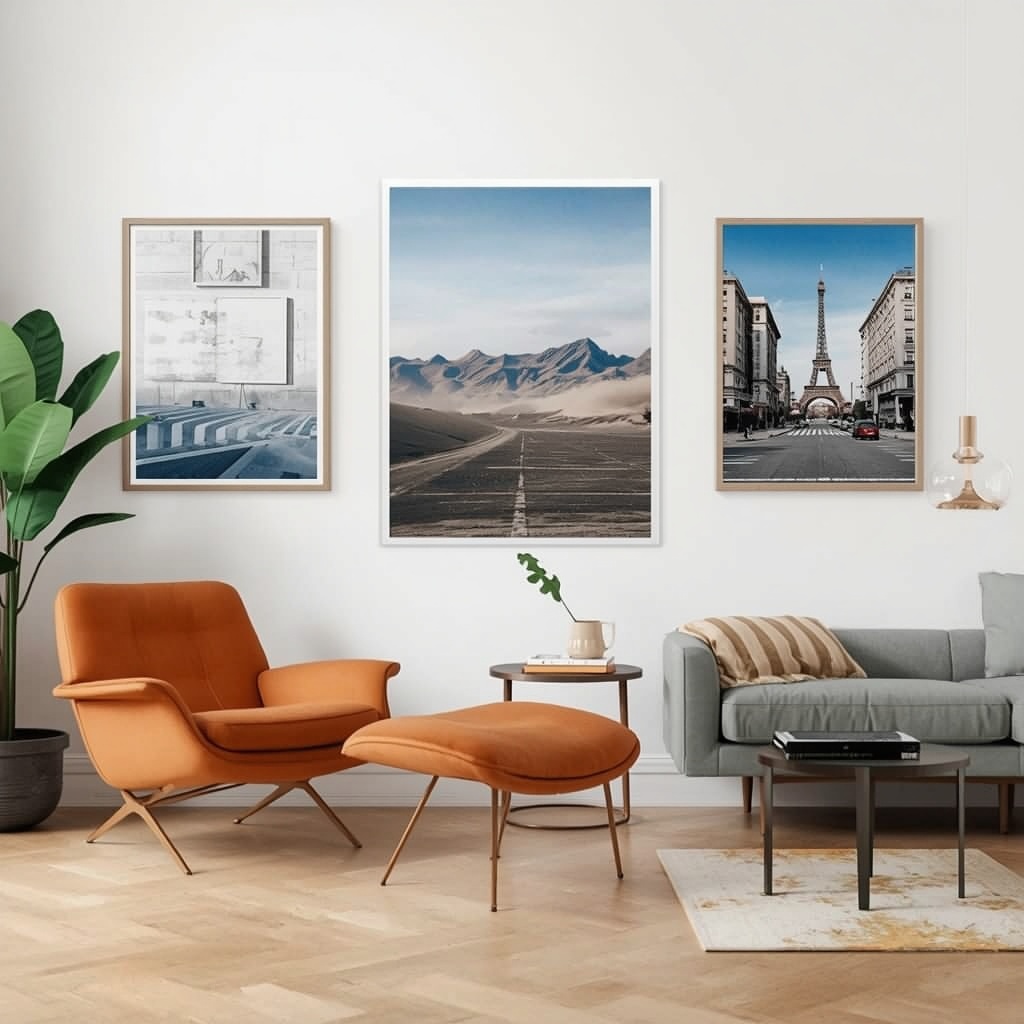
A gallery wall is a curated arrangement of framed artwork, photographs, prints, and decorative objects displayed together on a single wall to create a cohesive visual statement. It’s one of the most impactful and affordable ways to transform a blank, boring wall into a focal point that reflects your personality and style.
Gallery walls work in virtually every room — living rooms, hallways, stairwells, home offices, and even bedrooms. They add warmth, texture, and visual interest without the need for expensive furniture or architectural changes. Think of it as wearable art for your home — a deeply personal expression that makes a space feel truly lived-in and styled.
Step 1: Choose Your Gallery Wall Style Before You Shop
One of the biggest mistakes homeowners make is buying frames and artwork before they decide on a visual direction. Shopping without a style in mind leads to a mismatched, cluttered result — the opposite of that polished, expensive look you’re after.
Here are the most popular gallery wall styles to consider:
| Style | Look & Feel | Best Room |
|---|---|---|
| Classic Grid | Uniform frames in identical sizes, perfectly spaced | Living room, hallway |
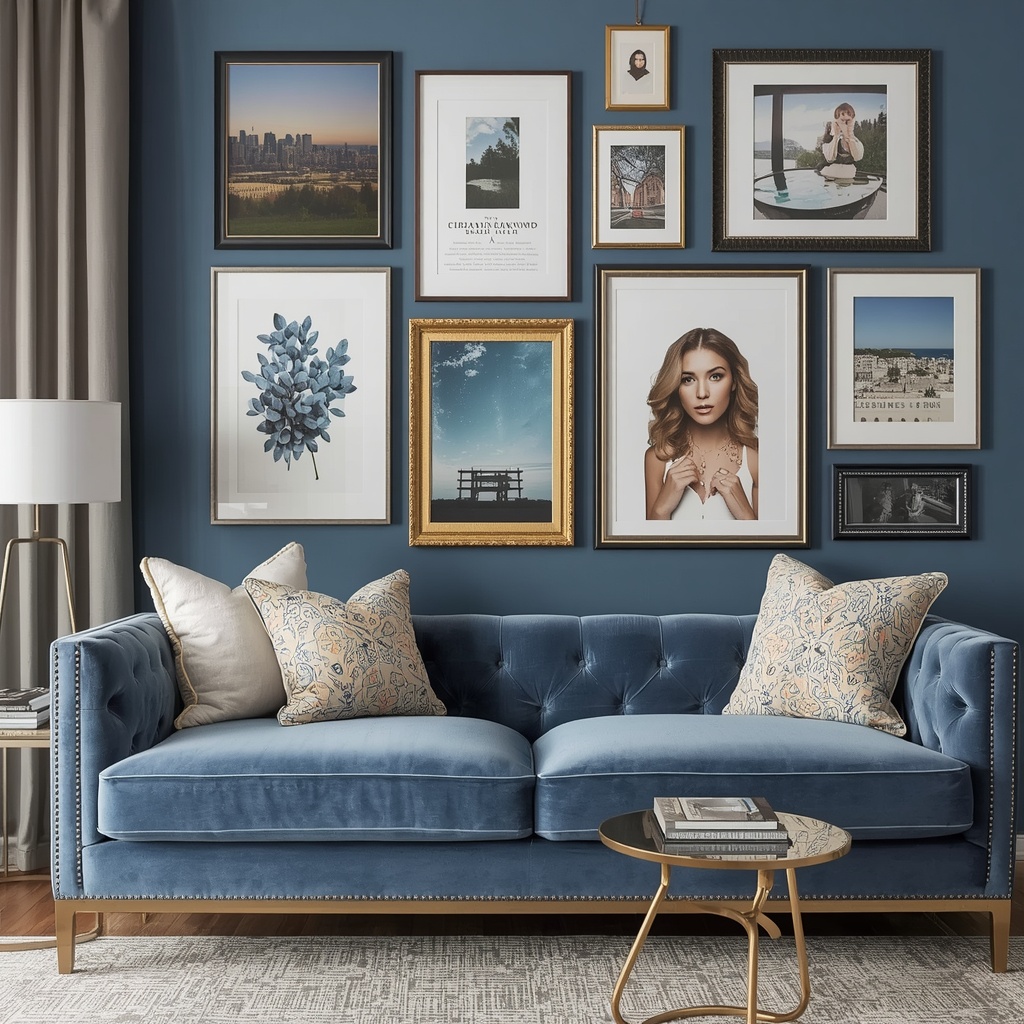
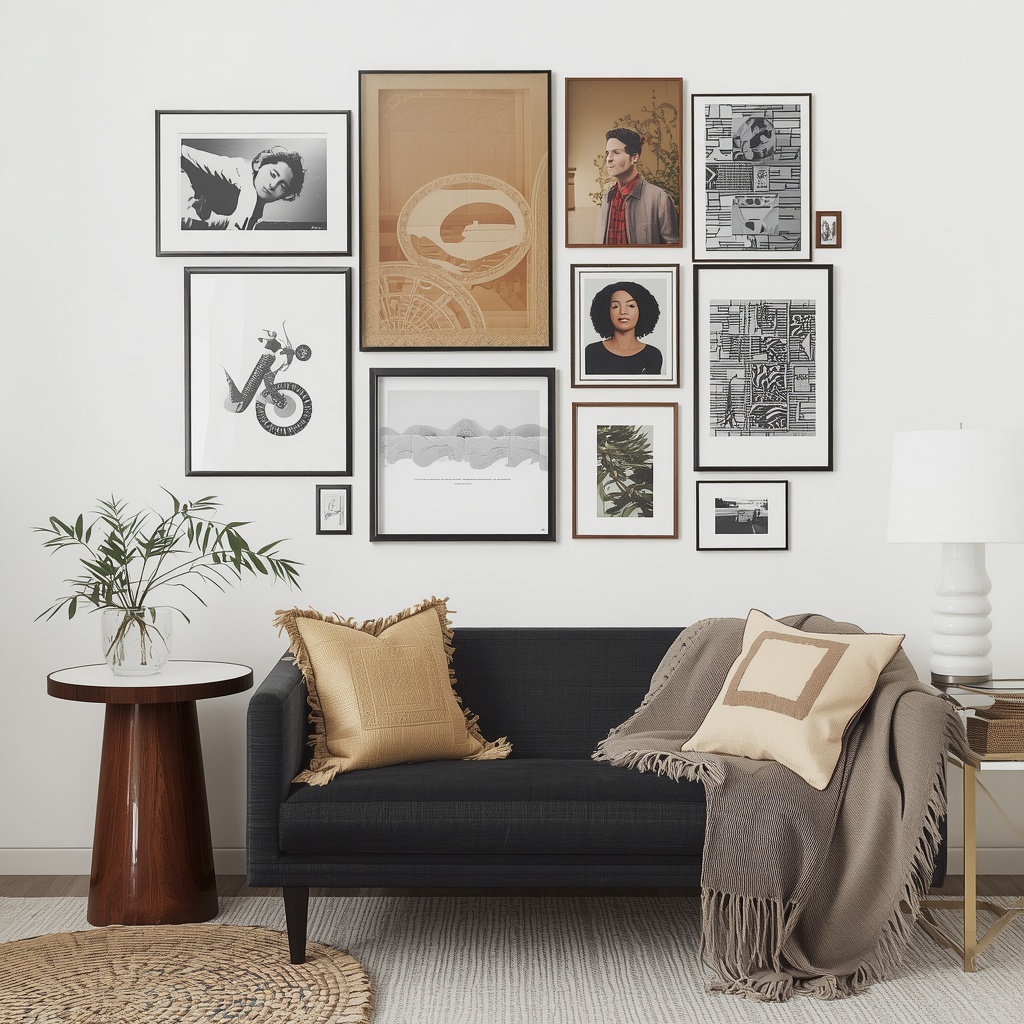
| Salon Style | Eclectic mix of sizes, styles, and subjects | Living room, stairwell |
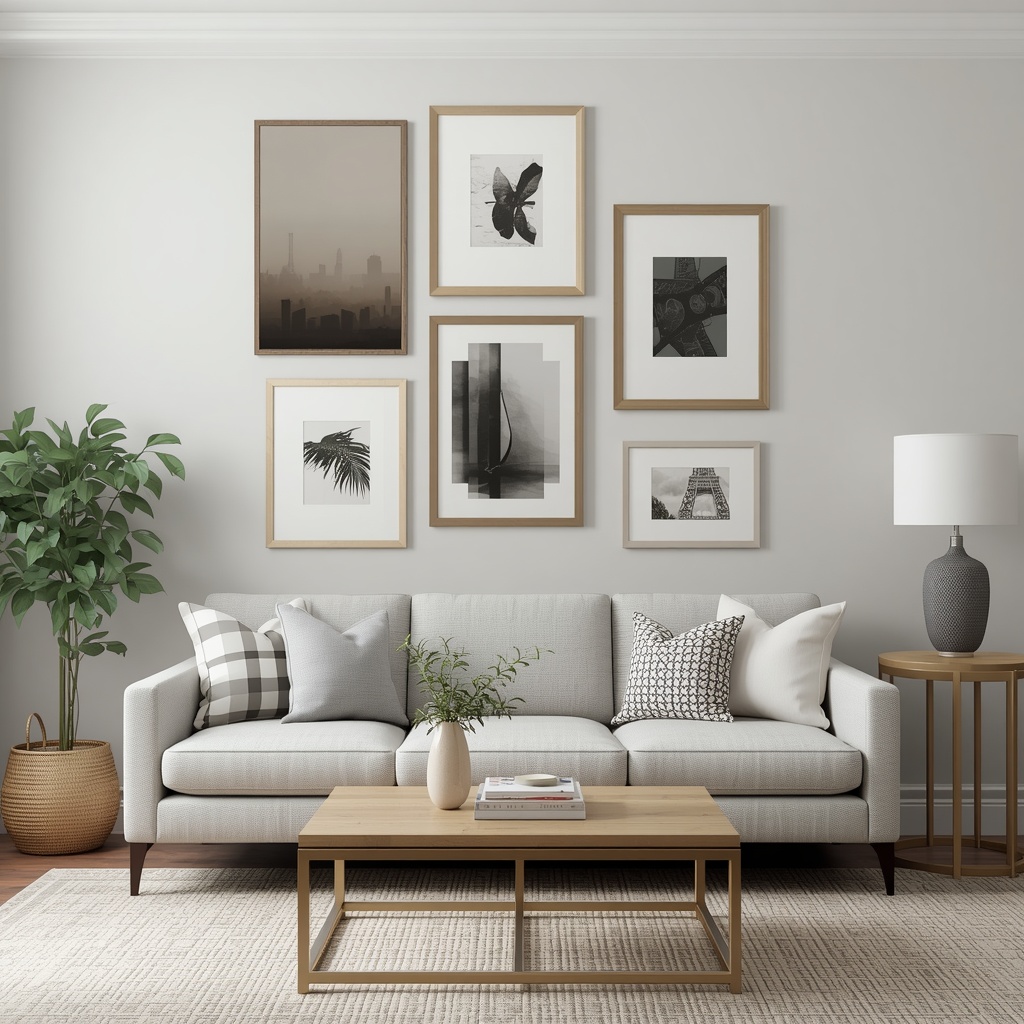
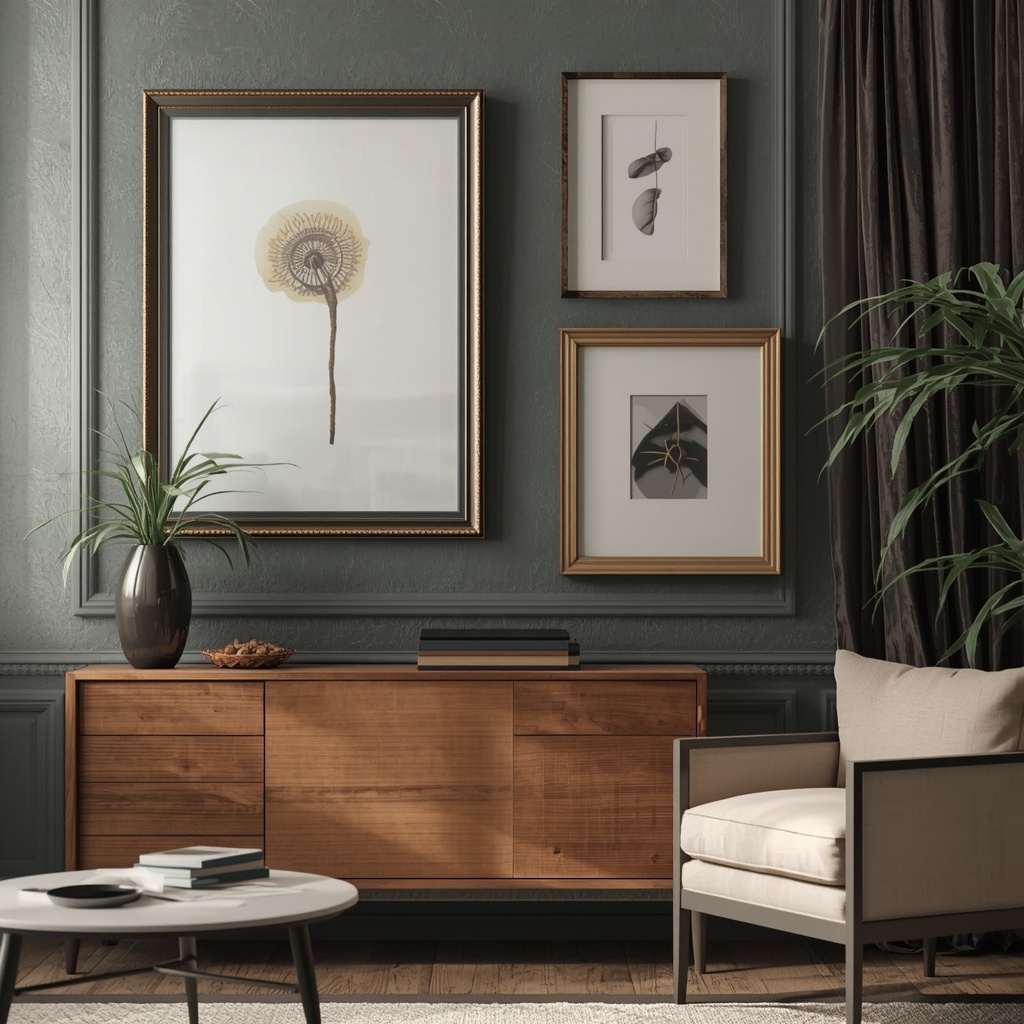
| Modern Minimal | Black-and-white palette, simple frames, lots of white space | Bedroom, office |
| Botanical/Nature | Pressed botanicals, nature prints, warm wood frames | Kitchen, sunroom |
| Family Portrait | Mix of photos with occasional art pieces | Hallway, family room |
| Monochromatic | One color family, varying textures and tones | Dining room, bedroom |
Once you know your style, every purchase decision becomes easier and more intentional.
“A gallery wall should tell a story. Before you hang a single frame, ask yourself: what do I want this wall to say about me and my home?” — Interior Design Principle
Step 2: Find Artwork That Looks High-End Without the High-End Price Tag
This is where budget gallery walls succeed or fail. The artwork itself is everything, and the great news is that stunning, gallery-quality prints are more accessible than ever.
Best Places to Find Affordable Wall Art in the US:
- Juniper Print Shop — Digital downloads you print at home or at a local print shop; prices start at $5
- Etsy — Search “printable wall art” or “digital download art print” for thousands of options under $10
- Desenio — Scandinavian-inspired affordable prints, often on sale
- Society6 — Independent artists selling prints starting around $15
- Thrift stores — Goodwill, Habitat for Humanity ReStores, and local secondhand shops often have hidden gem prints and vintage art for $1–$5
- IKEA — The BILD series and PJÄTTERYD prints offer clean, modern art at budget prices
- Your own photography — Use apps like Canva to edit your best photos into black-and-white or high-contrast prints
🔖 Pro Tip: Download free high-resolution art from public domain sources like the Rijksmuseum Collection or The Metropolitan Museum of Art Open Access. These are genuine museum-quality works — Vermeer, Monet, Van Gogh — available completely free and legally printable for personal use. Print them at Walgreens, Costco, or your local print shop for under $5 per print. It’s one of the best-kept secrets in affordable home décor.
Step 3: Choose Frames That Look Expensive
Frames can make or break the expensive look you’re going for. Cheap, flimsy frames with low-quality glass will instantly undercut even the most beautiful artwork. Here’s how to choose wisely on a budget.
Frame Selection Tips:
- Stick to a maximum of two or three frame colors. Black, white, and natural wood are the most versatile. Mixing too many finishes looks scattered rather than curated.
- Avoid mismatched widths. If you’re mixing frame styles, keep the molding width consistent (all thin frames, or all chunky frames — don’t mix).
- Add mats. A white mat inside a frame instantly elevates the look and makes a small print feel more significant. It’s the single easiest way to make budget art look gallery-worthy.
- Look for deep rabbet frames. These have a deeper channel that adds shadow and dimension — a detail common in high-end framing but available in budget options too.
Best Budget Frame Sources:
| Store | Price Range | Notes |
|---|---|---|
| IKEA RIBBA | $5–$15 | Classic, clean lines; includes mat |
| Amazon Basics | $8–$20 | Good quality for the price |
| Michaels (with coupon) | $10–$40 | 40–60% off coupons available weekly |
| Dollar Tree | $1.25 | Best for small accent frames in a grid |
| HomeGoods/TJ Maxx | $8–$25 | Hit-or-miss but often great finds |
| Walmart Mainstays | $5–$15 | Surprisingly solid quality |
🔖 Pro Tip: Always shop Michaels with their app coupon — they run 40% to 50% off a single regular-priced item almost every week. If you need 12 frames, buy them across multiple trips or use different family members’ phones to stack discounts. This alone can cut your frame budget in half.
Step 4: Plan Your Layout Before You Put a Single Nail in the Wall
This is the step most people skip — and it’s the reason so many DIY gallery walls end up looking off. Planning your layout on paper (or on the floor) before committing to the wall will save you from a Swiss cheese situation with your drywall.
The Paper Template Method:
Trace each frame onto craft paper or brown packing paper and cut out the shapes. Tape these templates to your wall with painter’s tape. Step back, live with the arrangement for a day or two, and adjust before you ever pick up a hammer. This method is used by professional designers every single time — it’s not a beginner workaround, it’s the smart way to do it.
Layout Rules to Follow:
- Start with your anchor piece — the largest or most visually dominant item — and build outward from there.
- Keep consistent spacing. Two to three inches between frames creates a cohesive, intentional look. More than four inches starts to look disconnected.
- Mix horizontal and vertical orientations for visual variety and movement.
- Maintain a visual center line. Whether your gallery wall is symmetrical or asymmetrical, keeping all pieces within the same imaginary bounding box creates cohesion.
- Eye-level placement matters. The visual center of your gallery wall should sit at approximately 57 to 60 inches from the floor — the standard gallery hanging height used by museums and design professionals.
“The space between frames is just as important as the frames themselves. Breathing room is what separates a curated collection from a cluttered wall.”
Step 5: Add Dimension With Non-Frame Elements
This is the secret weapon of designers who create gallery walls that look truly editorial and expensive. Breaking up flat frames with three-dimensional objects adds depth, texture, and a collected-over-time feel that can’t be replicated with prints alone.
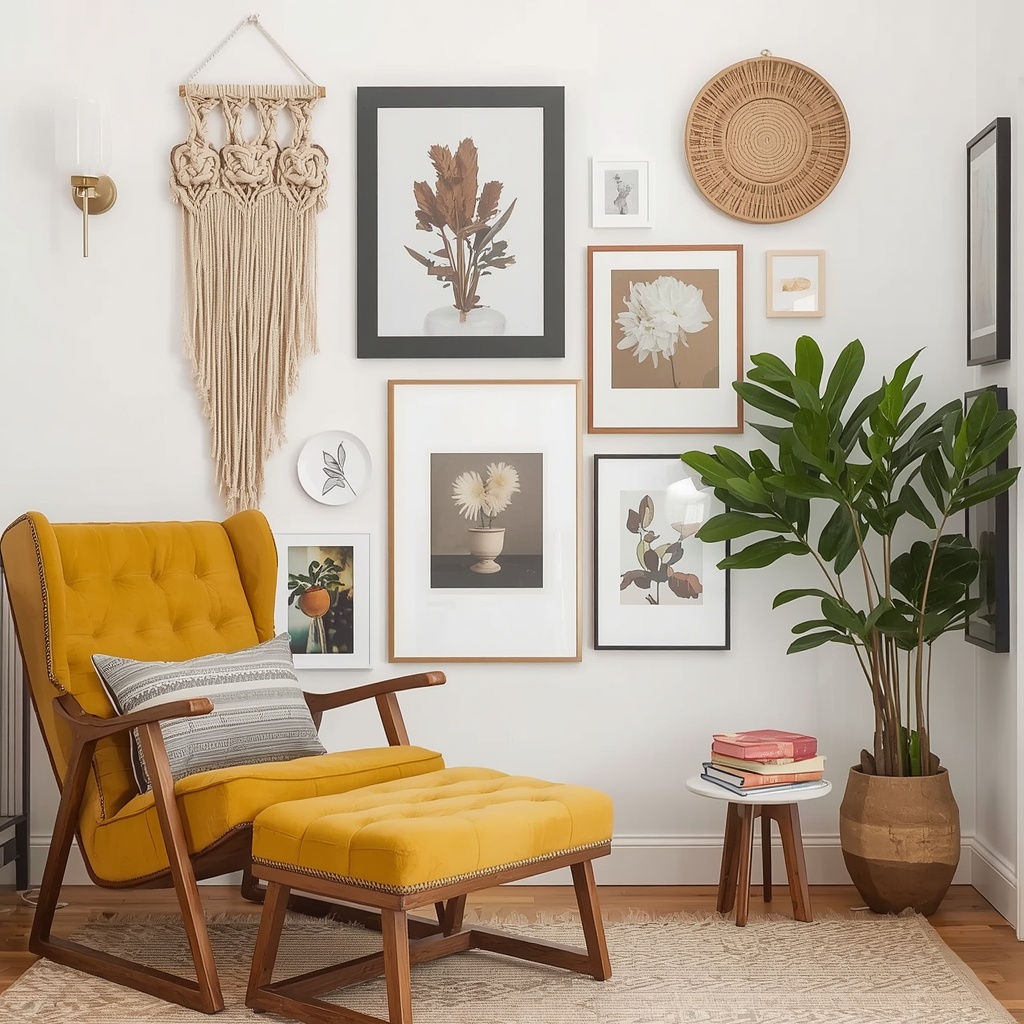
Budget-Friendly 3D Gallery Wall Elements:
- Woven wall hangings — Macramé or woven textile pieces add warmth and organic texture; find them at HomeGoods or on Etsy for $15–$40
- Decorative plates — Vintage or ceramic plates hung with plate hangers add an eclectic, worldly charm; thrift stores are goldmines for these at $1–$3 each
- Mirrors — A small round mirror in a simple frame adds light, depth, and a high-end touch; Target’s threshold line has great options under $25
- Sculptural wall objects — Rattan sunbursts, wooden letters, metal wall art from HomeGoods or At Home stores
- Dried or pressed botanicals — Shadow box frames with dried flowers or pampas grass look incredibly high-end and can be made for under $10
- Wall sconces — A plug-in wall sconce adds drama and lighting; cord covers make it look built-in
Using three to five non-frame elements in a gallery wall of 10 to 15 pieces creates a layered, designer look that feels considered and unique.
Step 6: Nail the Installation
All your careful planning pays off only if the execution is clean. Here’s how professionals hang gallery walls without damage or crooked frames.
Essential Tools:
- Level (or a free level app on your phone)
- Painter’s tape
- Command strips (for lightweight frames — no holes required)
- Picture-hanging strips for heavier frames
- A pencil and ruler
- Hammer and nails (for anything over 8 lbs)
Installation Tips:
Full Budget Breakdown: What a Designer-Worthy Gallery Wall Actually Costs
Here’s a realistic budget breakdown for a 12-piece gallery wall using the strategies above:
| Item | Quantity | Cost Each | Total |
|---|---|---|---|
| Art prints (digital download + print at Costco) | 8 | $3–$6 | $24–$48 |
| Public domain museum prints (printed locally) | 3 | $4 | $12 |
| IKEA RIBBA frames (8×10) | 6 | $7 | $42 |
| Michaels frames with 40% coupon (11×14) | 3 | $12 | $36 |
| Dollar Tree accent frames | 3 | $1.25 | $3.75 |
| Thrifted decorative plate | 2 | $2 | $4 |
| Small woven wall hanging (HomeGoods) | 1 | $19 | $19 |
| Command strips + hanging hardware | — | — | $12 |
| TOTAL | ~$153–$177 |
For under $180, you can have a gallery wall that looks like it belongs in an Architectural Digest feature.
Common Gallery Wall Mistakes to Avoid
Before you start shopping, keep these designer warnings in mind:
- Don’t hang everything too high. This is the single most common mistake. Keep your gallery wall’s visual center at eye level, not ceiling level.
- Don’t use too many colors. Limiting your color palette to two or three tones creates cohesion.
- Don’t skip the planning phase. Going straight to nails without a layout plan almost always results in a do-over.
- Don’t ignore the wall color. A gallery wall pops against a bold, saturated wall color. If your walls are white or off-white, consider doing a paint-dipped accent wall first.
- Don’t forget to vary your content. All photographs, or all prints of the same style, will feel flat. Mix photography, illustration, typography, and objects for visual richness.
Final Thoughts: Invest in Intention, Not Price Tags
Creating a gallery wall that looks expensive is less about what you spend and more about the decisions you make — the consistency of your frame palette, the quality of your prints, the deliberateness of your layout, and the little touches of dimension that make a wall feel lived-in and layered.
Start with a clear style direction, source art from free and affordable channels, commit to a tight color palette, plan your layout on the floor before touching a nail, and mix in at least a few three-dimensional elements. Follow those steps and your gallery wall will stop guests in their tracks — in the best possible way.
The most beautiful homes I’ve walked into weren’t expensive. They were intentional. And a gallery wall done right is one of the clearest expressions of that intention you can create.
Ready to start planning your gallery wall? Pin your favorite frames, download some free museum art, and give that blank wall the transformation it deserves.
Related Topics to Explore: home décor on a budget | DIY wall art ideas | affordable interior design | apartment decorating ideas | small space wall décor | picture frame arrangements | thrift store home décor | printable wall art | boho gallery wall | minimalist gallery wall