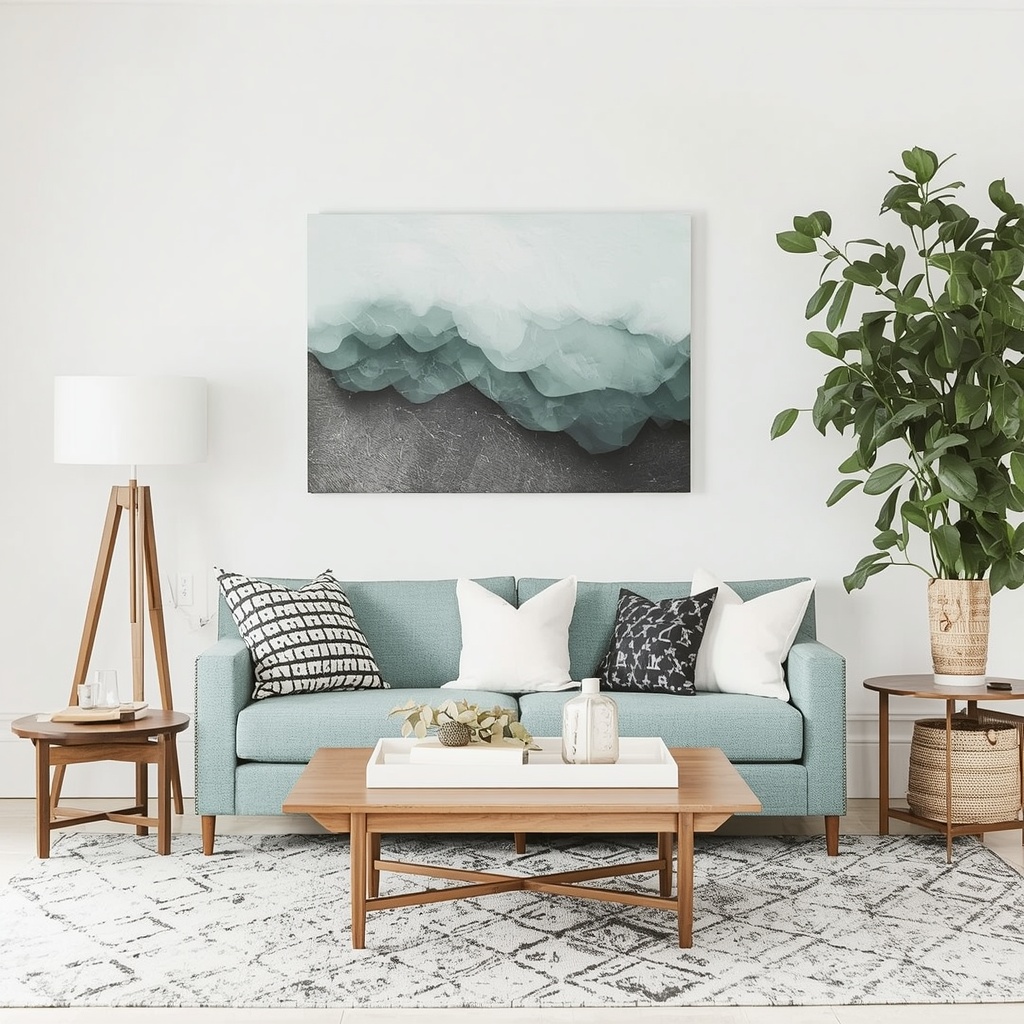
Blank walls are basically the untapped real estate of your home. They whisper potential — and yet so many of us scroll Pinterest for hours, sigh deeply, and then do absolutely nothing about them. Sound familiar? Here’s the truth I tell every single client: you do not need a design degree, an art background, or an endless budget to create stunning wall art. You just need a free weekend, a few supplies, and a little creative courage.
Whether you’re revamping your living room, adding personality to a hallway, or finally doing something about that sad blank wall above your couch, this guide is your weekend game plan. From abstract canvas painting to textured macramé and everything in between, these DIY wall art ideas are approachable, budget-friendly, and genuinely impressive. Let’s get your walls talking.
Why DIY Wall Art Is the Smartest Home Decor Move You Can Make
Before we dive into the projects, let’s talk about why this matters from a design perspective. Store-bought art is beautiful, but it’s also generic. The moment you walk into a home and see something clearly handmade — a gallery wall with personal photos, a painted canvas in the exact shade of sage green that matches the throw pillows — there’s a warmth and intentionality that no big-box store can replicate.
DIY wall decor also gives you complete control over scale, color palette, and style. It’s one of the most cost-effective ways to achieve a high-end, curated look without the designer price tag. Plus, there’s genuine psychological value in surrounding yourself with things you created. Studies in environmental psychology consistently show that personalized spaces reduce stress and increase feelings of comfort and belonging.
“The most beautiful rooms I’ve ever designed weren’t the most expensive ones. They were the ones where the homeowner had poured a piece of themselves into the space.” — Interior Design Principle, Studio 9 Design
What You’ll Need: A Basic DIY Wall Art Supply Kit
Before starting any project, it helps to build a core supply kit. You don’t need everything at once — start with one project and build from there.
| Supply | Where to Buy | Estimated Cost |
|---|---|---|
| Canvas panels or stretched canvas | Michaels, Amazon | $5–$25 |
| Acrylic paint set | Walmart, Hobby Lobby | $10–$20 |
| Painter’s tape | Home Depot | $5–$8 |
| Foam rollers & brushes | Dollar Tree, Amazon | $3–$10 |
| Picture hanging strips | Amazon, Target | $8–$15 |
| Macramé cord (natural cotton) | Amazon, Etsy | $10–$18 |
| Wooden dowels | Hobby Lobby, craft stores | $3–$6 |
| Old frames (thrifted) | Goodwill, Facebook Marketplace | $1–$10 |
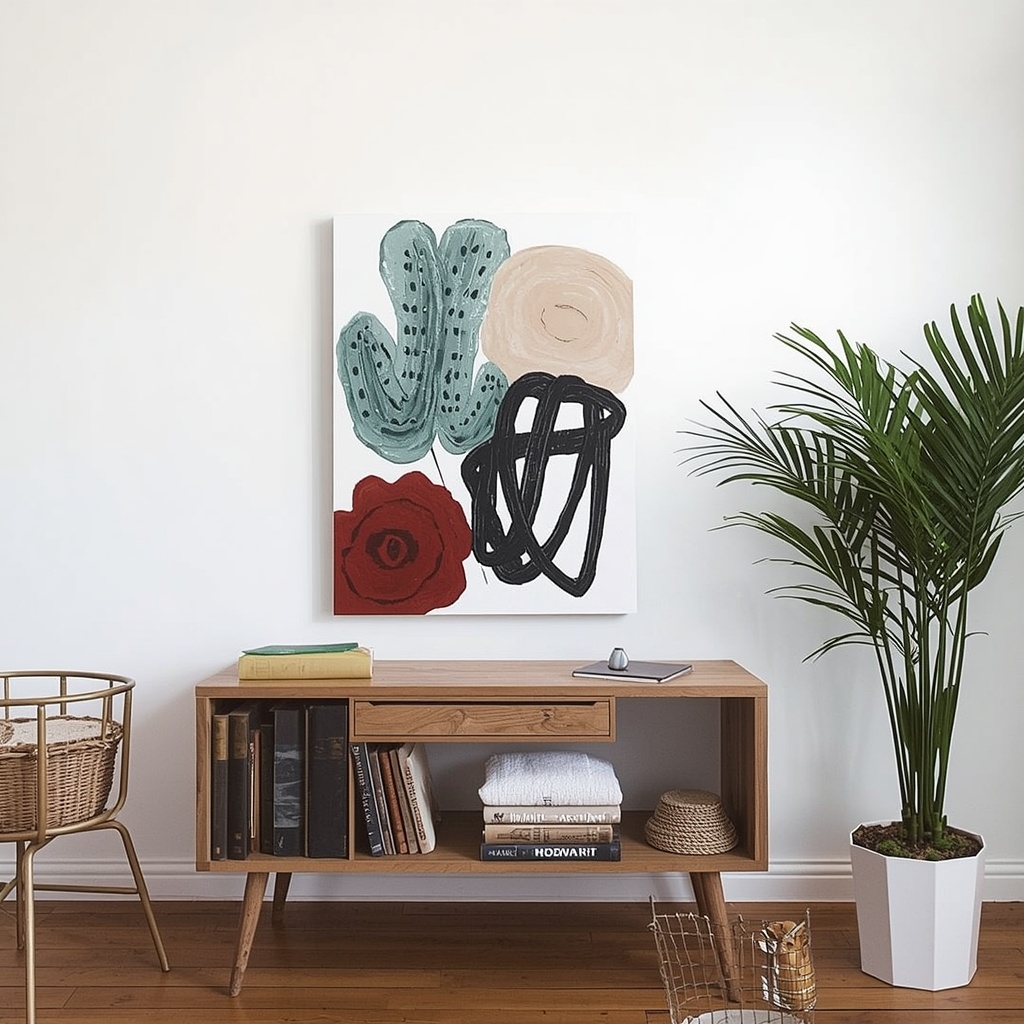
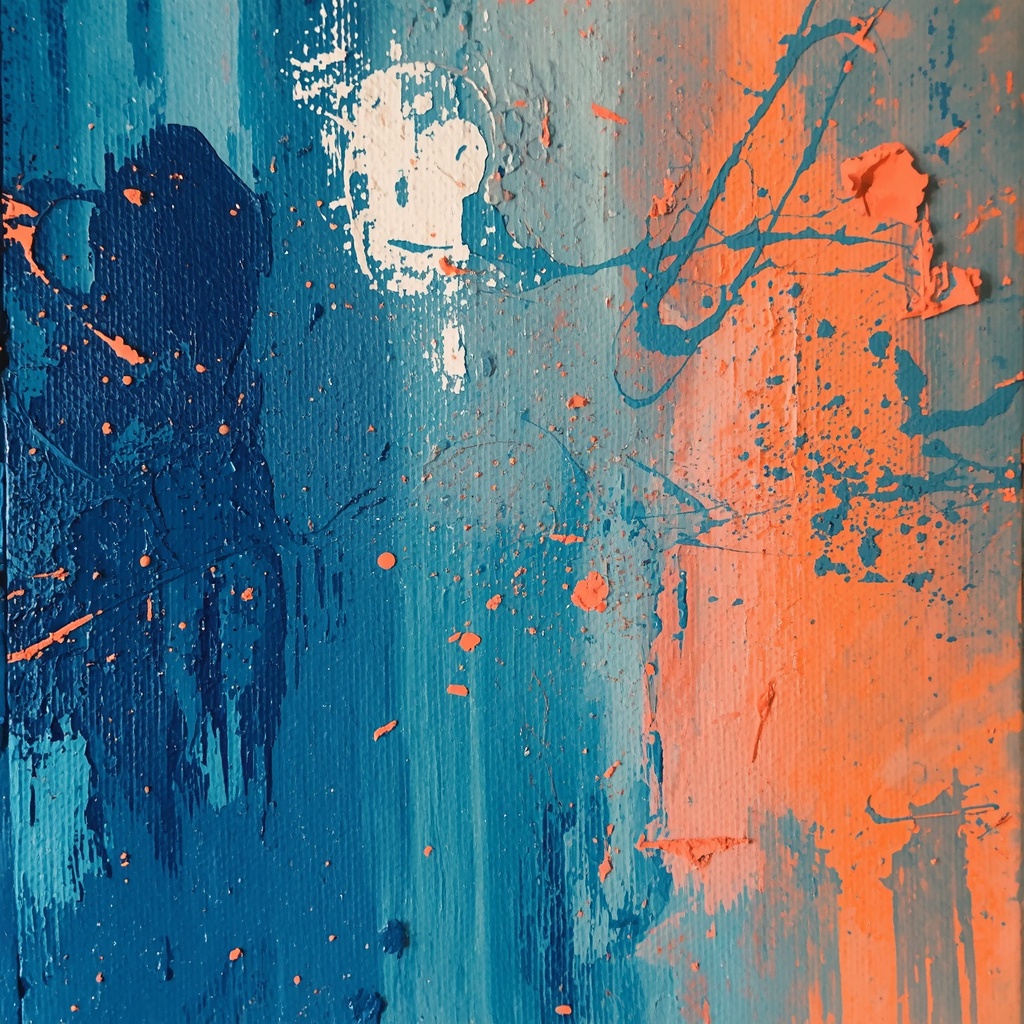
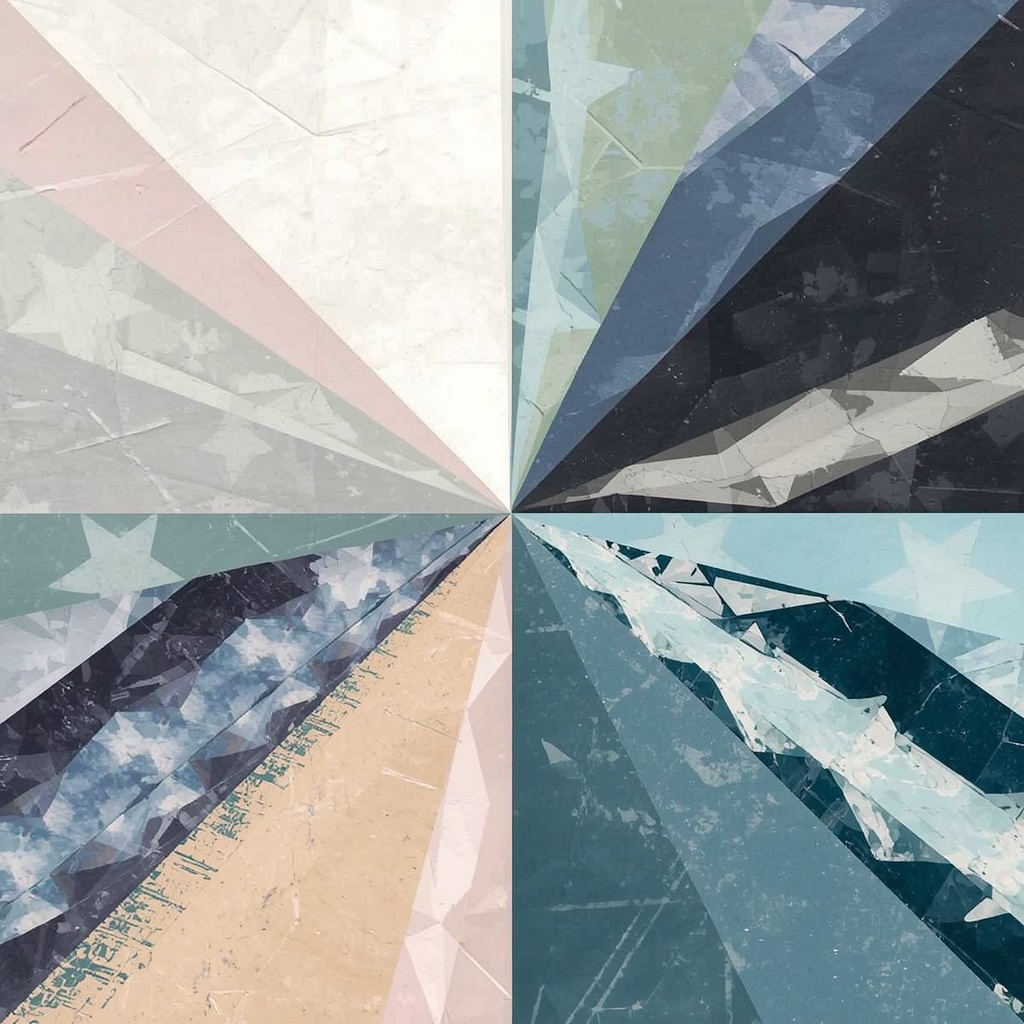
1. Abstract Acrylic Painting: Modern Art You Actually Made
Abstract painting is the single most forgiving DIY art project for beginners — and the results look legitimately sophisticated when done right. There are no rules, no “wrong” brushstrokes, and the imperfections are literally part of the aesthetic.
What you need: A stretched canvas (try an 18×24 or 24×30 for a statement piece), 3–5 acrylic paint colors in a cohesive palette, a variety of brush sizes, and a palette knife (optional but fun).
How to do it:
- Choose a color palette first. Stick to two or three main colors plus a neutral (white, cream, or black). Popular combinations right now include terracotta + cream + burnt sienna, dusty sage + white + navy, and blush + mauve + gold.
- Apply your lightest color as a base coat and let it dry completely (about 20 minutes for acrylics).
- Use bold, confident strokes with your main colors. Don’t overthink placement — work in diagonal or sweeping motions.
- Add texture by dabbing paint with a palette knife, crumpled plastic wrap, or even a credit card dragged across wet paint.
- Finish with thin lines or dots of your accent color for detail.
- Let dry fully (at least 2 hours) before hanging.
🔥 Pro Tip: Warm your colors slightly before starting by painting a very thin wash of yellow ochre over your entire canvas. This creates a beautiful golden undertone that makes all your subsequent colors feel rich and cohesive — it’s the same trick professional painters use to unify a composition.
2. Geometric Tape Art: Clean, Modern, and Practically Foolproof
If abstract feels too free-form for your personality, geometric tape art is your answer. This technique uses painter’s tape to create crisp, architectural patterns — think triangles, diamonds, chevrons, or sunbursts — and it’s genuinely hard to mess up.
What you need: A canvas or even a section of painted wall, painter’s tape (Frog Tape gives the cleanest lines), 2–4 paint colors.
How to do it:
- Plan your design on paper first. Triangles are the easiest starting point.
- Apply strips of painter’s tape in your desired pattern, pressing edges firmly to prevent bleed.
- Paint each section in your chosen colors. You can do solid colors or blend within each section.
- While paint is still slightly tacky (not fully wet, not fully dry), gently peel the tape at a 45-degree angle.
- Touch up any small bleeds with a fine brush.
Trending geometric styles to try:
- Color-blocked halves (great for over a bed)
- Sunburst/starburst pattern (very boho, very now)
- Diamond grid with metallic accents
- Minimalist single triangle in a contrasting color
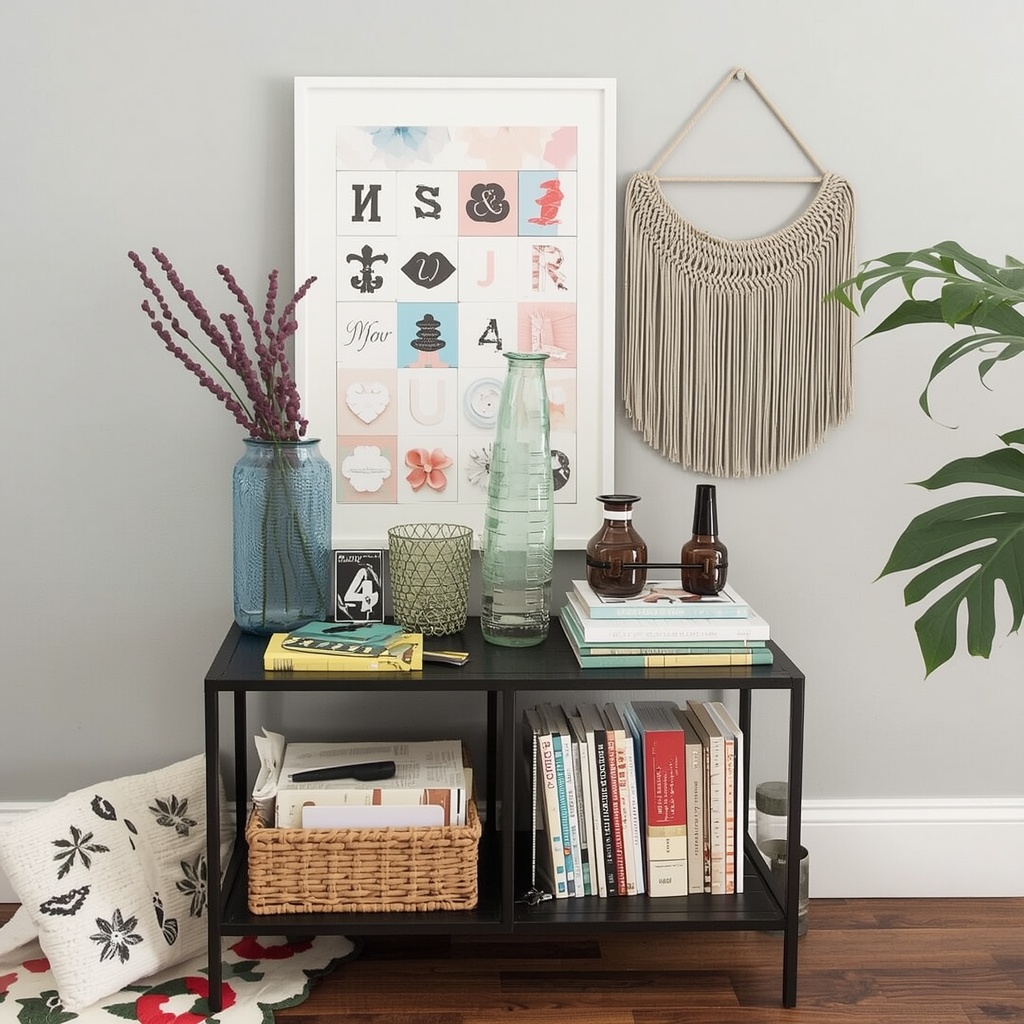
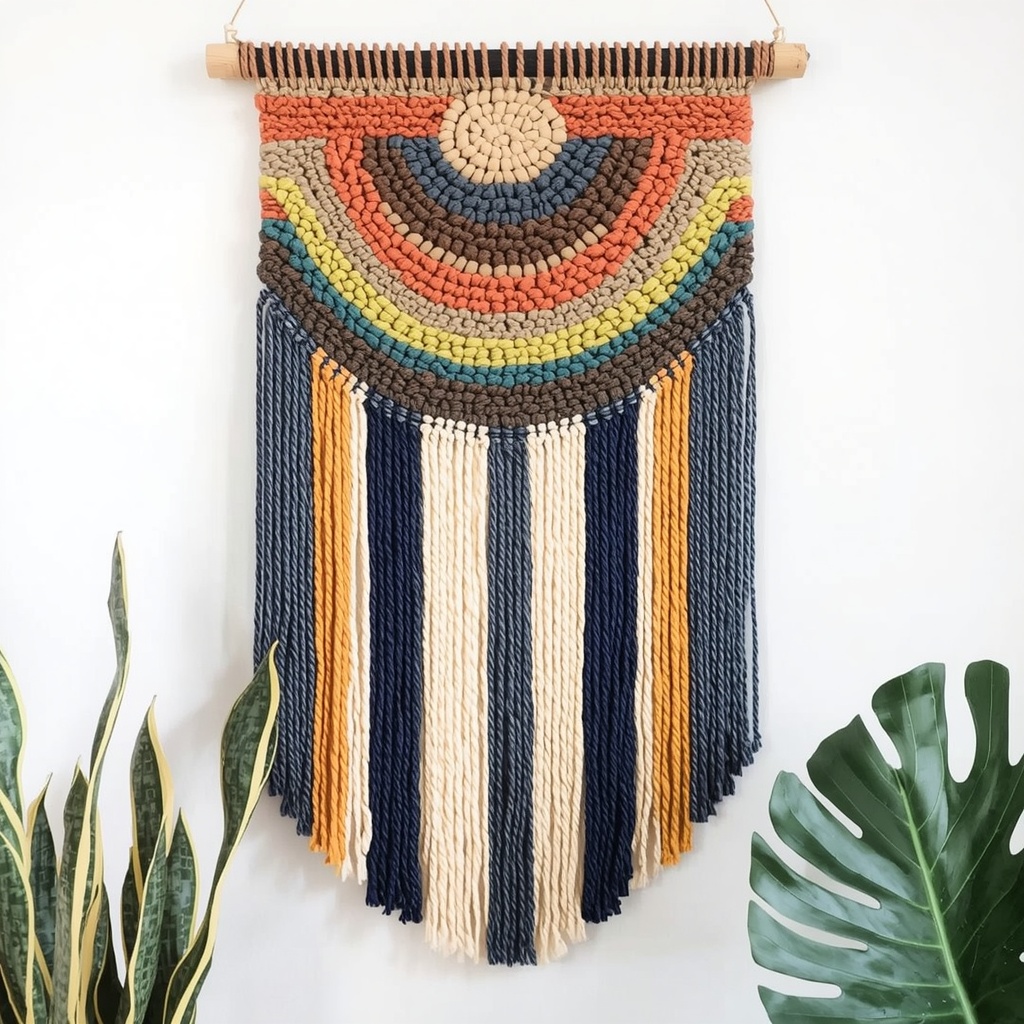
3. Macramé Wall Hanging: Boho Texture That Elevates Any Space
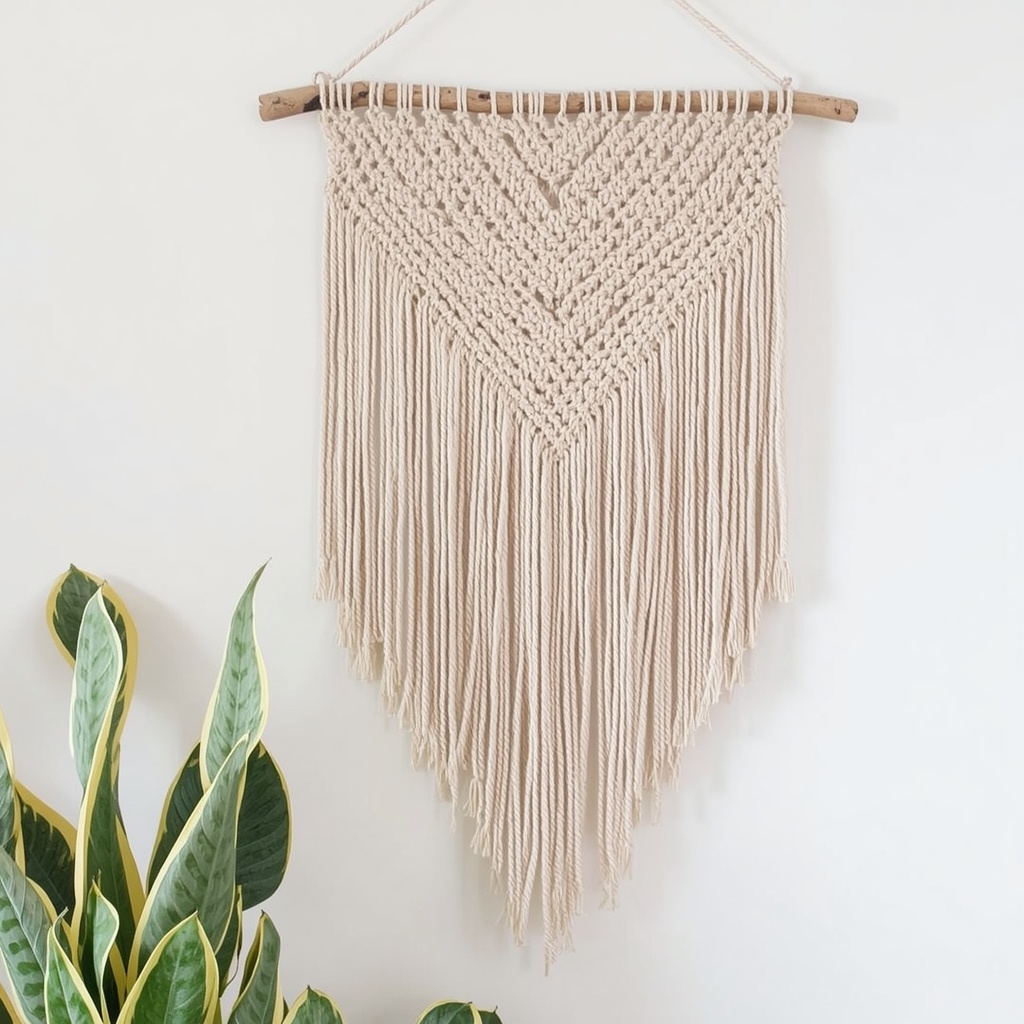
Macramé has made a massive comeback and for good reason — it adds warmth, dimension, and that coveted boho-chic texture that works in modern farmhouse, coastal, and eclectic interiors alike. The good news? You only need to learn two or three basic knots to create something beautiful.
Basic knots to master:
- Square knot — the workhorse of macramé; creates the classic woven look
- Half hitch knot — creates diagonal lines and patterns
- Lark’s head knot — used to attach cords to the dowel
Simple beginner wall hanging:
Cut 20 cords of natural cotton macramé rope, each about 4 feet long. Fold each cord in half and attach to a wooden dowel using lark’s head knots. Working in groups of four cords, tie square knots down the length. Add a few rows of half hitches for diagonal texture. Trim the fringe at the bottom in a V-shape or straight line and brush it out with a pet slicker brush for that signature fluffy finish.
“Texture is the secret weapon of interior design. When a wall has dimensional art — something you can almost feel just by looking at it — the entire room feels more layered and intentional.”
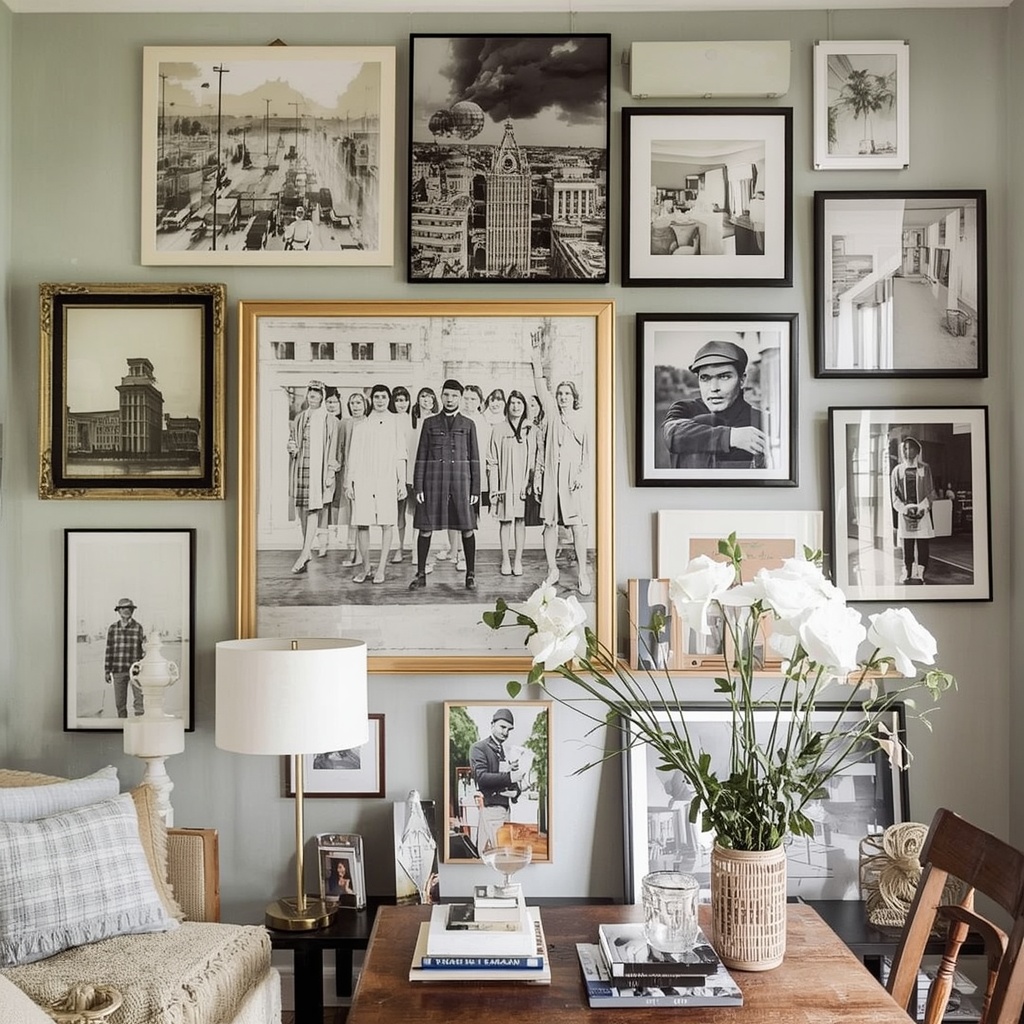
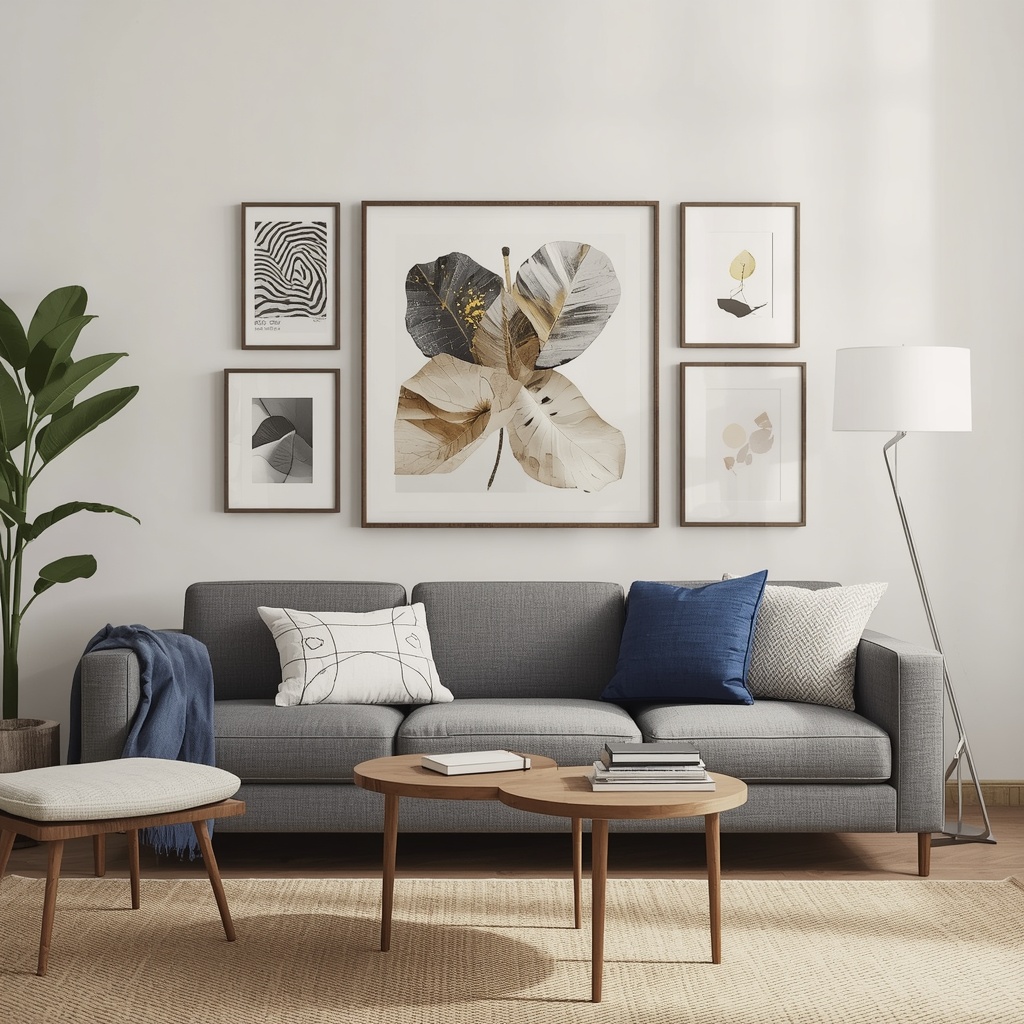
4. Gallery Wall: The Art of Curated Chaos (Done Right)
A gallery wall is one of the highest-impact, most customizable DIY wall art ideas you can execute. It can be bohemian or minimal, colorful or monochromatic, mixed media or strictly photography. The key is intentional curation — it should feel curated, not cluttered.
Gallery wall formula that never fails:
| Element | Recommendation |
|---|---|
| Anchor piece | One large piece (16×20 or bigger) as the visual center |
| Supporting pieces | 4–6 medium frames (8×10, 5×7) |
| Accent pieces | 2–3 small pieces, objects, or wall sculptures |
| Spacing | 2–3 inches between each piece |
| Color cohesion | Match frame colors OR mat colors, not necessarily both |
Step-by-step layout process:
- Lay all pieces on the floor first and arrange until satisfied
- Cut paper templates of each piece and tape them to the wall with painter’s tape
- Step back and live with it for a day before committing any nails
- Start hanging from the center anchor piece and work outward
What to include in a gallery wall:
- Personal photos (printed at Walgreens, CVS, or Chatbook)
- Art prints from Minted or Society6
- Thrifted vintage frames repainted to match
- Pressed botanical prints (free to DIY — see below)
- Small mirrors for light reflection
- Meaningful quotes in a simple frame
🔥 Pro Tip: Use Canva to design your own art prints for free. Choose a clean sans-serif font, a meaningful word or phrase, and download at high resolution for a custom print that costs under $2 to print at your local pharmacy.
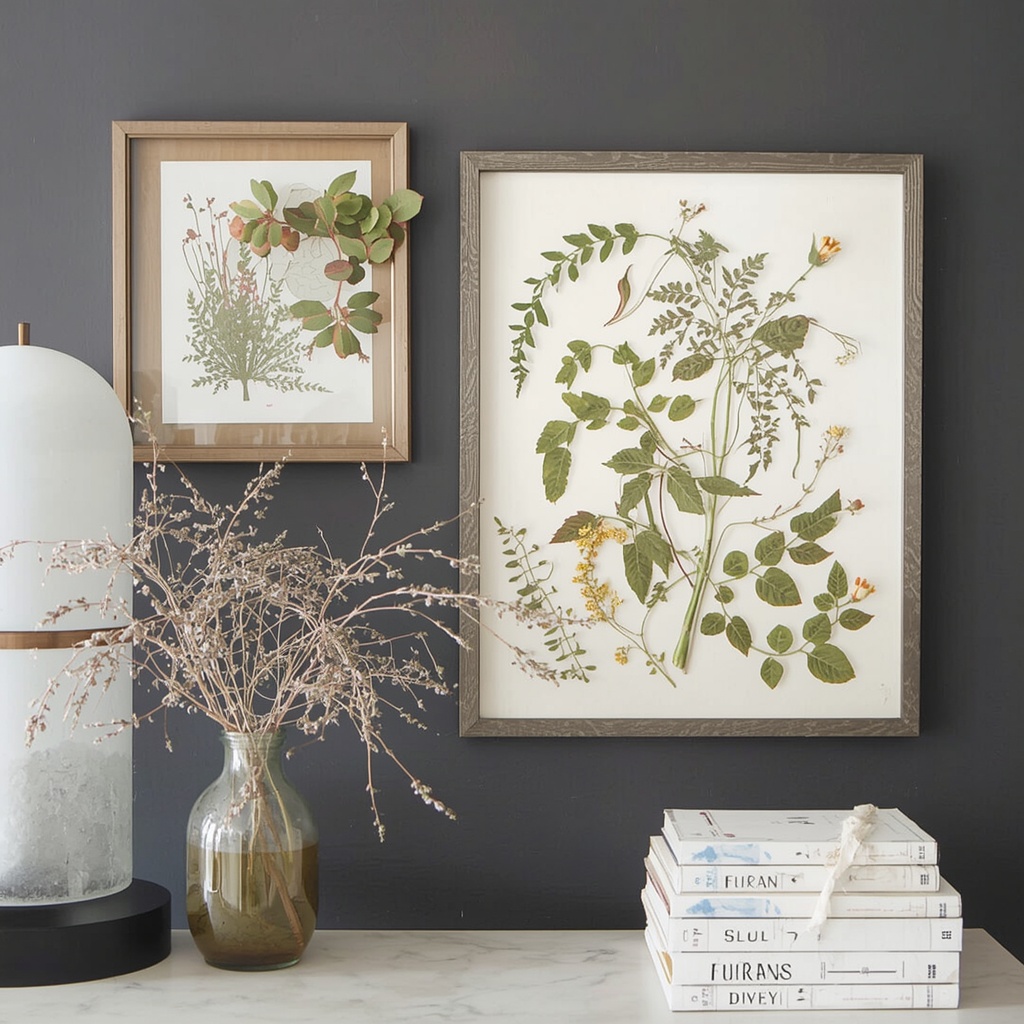
5. Pressed Botanical Art: Bringing the Outside In
This is one of the most elegant and underrated DIY wall art ideas in my design toolkit. Pressed botanical prints have that high-end, editorial quality — the kind you see in Anthropologie or at boutique hotels — but cost almost nothing to create.
How to press botanicals:
- Collect leaves, ferns, wildflowers, or herbs from your yard or a local park
- Place between two sheets of parchment paper inside a heavy book
- Stack additional books on top and wait 1–2 weeks for full pressing and drying
- Once dried, arrange on watercolor paper and secure with a tiny dot of clear-drying glue
- Frame under glass to preserve
Best plants for botanical pressing:
- Fern fronds (beautiful silhouette)
- Eucalyptus leaves
- Wildflowers like Queen Anne’s Lace or clover
- Herbs: rosemary, lavender, mint
- Fall leaves for seasonal art
For a cohesive set, create three botanicals in matching frames and hang in a horizontal trio. This looks particularly stunning in dining rooms, bathrooms, and entryways.
6. Woven Yarn Wall Art: Color-Rich Textile Art for Any Skill Level
Yarn wall hangings are having a serious moment in boho and maximalist interiors. Unlike macramé, yarn weaving doesn’t require knot knowledge — it’s a simple over-under technique on a DIY loom that almost anyone can learn in under an hour.
Quick DIY loom method:
You can create a simple loom by hammering nails into a piece of scrap wood at half-inch intervals across the top and bottom. String your warp thread (a thin cotton yarn) vertically between the nails, then weave your colorful yarn horizontally in an over-under pattern. Mix textures — smooth cotton, chunky wool, velvet ribbon — for a rich, layered look.
Color palette ideas for yarn wall art:
- Sunset palette: coral, peach, amber, dusty rose
- Desert palette: terracotta, sand, sage, rust
- Coastal palette: navy, white, seafoam, natural
- Neutral palette: cream, oatmeal, taupe, caramel
Common DIY Wall Art Mistakes (And How to Avoid Them)
Even the best weekend warriors make these errors. Here’s how to sidestep them:
- Hanging too high. Art should be centered at eye level — roughly 57–60 inches from the floor to the center of the piece. Most people hang it way too high.
- Going too small. A tiny piece of art on a big wall looks like a postage stamp. When in doubt, go larger.
- Ignoring the undertones. Paint and art have undertones. A “white” canvas with blue undertones will clash with warm cream walls. Check undertones before you start.
- Skipping the planning step. Always lay gallery walls on the floor or use paper templates before nailing anything. It saves enormous frustration.
- Using cheap hanging hardware. Invest in proper picture hanging strips or wall anchors. A beautiful piece of art shouldn’t fall at 2 AM.
Your Weekend DIY Wall Art Action Plan
Here’s how to approach your weekend project like a designer would:
Saturday:
- Choose your project and gather supplies (Michaels and Hobby Lobby often have 40–50% off coupons on their apps)
- Prep your workspace
- Execute the project — allow for drying time overnight
Sunday:
- Do final touch-ups
- Layout and plan your wall arrangement using the paper template method
- Hang your art and style the surrounding space
The entire process — from blank wall to finished room — can genuinely be completed in two days. And the result? A home that looks intentional, personal, and beautifully curated, for a fraction of what it would cost to buy equivalent pieces from a retail store.
Final Thoughts: Your Home Deserves Walls With a Story
The homes I’ve designed that people respond to most emotionally are never the ones with the biggest budgets. They’re the ones where you can feel the personality of the person who lives there — where something on the wall makes you ask, “Where did you get that?” and the answer is, “I made it.”

DIY wall art is one of the most powerful tools in home decorating because it merges creativity, personal expression, and smart design into something tangible. Whether you spend a weekend painting an abstract canvas, weaving a yarn hanging, or assembling a gallery wall of memories and prints, the result is always the same: a space that feels genuinely, unmistakably yours.
So pick one project from this list, clear your Saturday morning, and get started. Your walls have been waiting long enough.
Related reads: How to Choose the Right Paint Color for Every Room | The Complete Guide to Gallery Walls | Boho Home Decor on a Budget