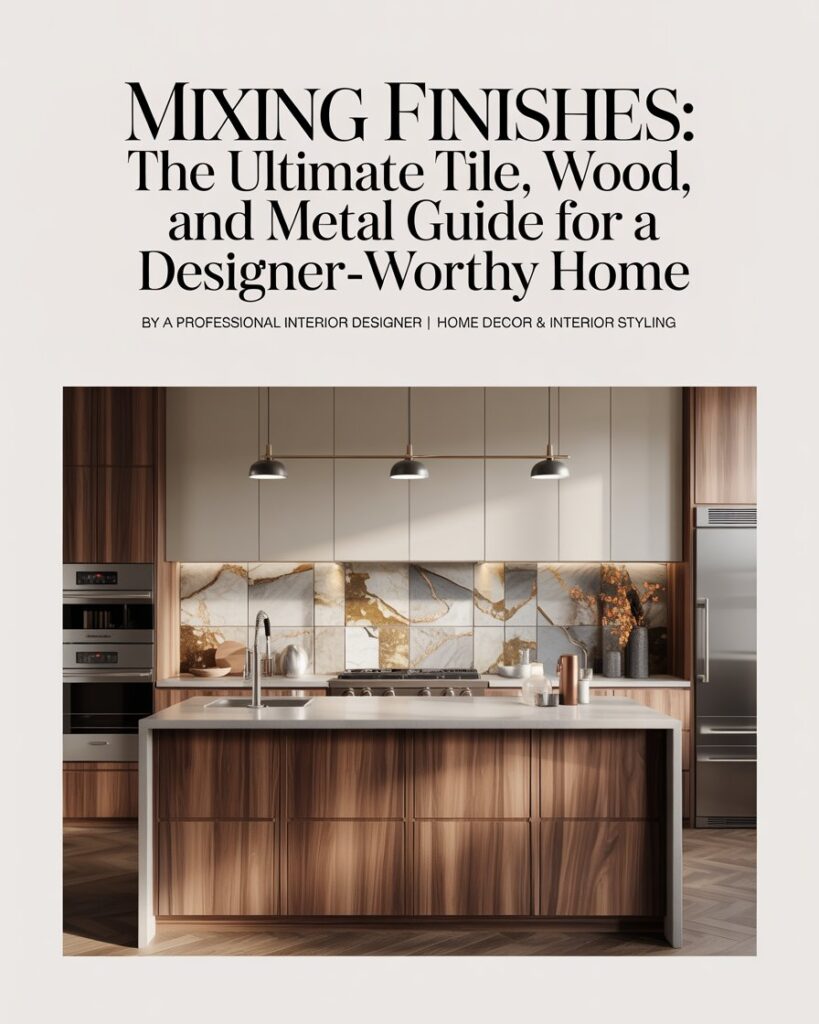
By a Professional Interior Designer | Home Decor & Interior Styling
If you’ve ever walked into a room and thought, “This just feels right,” chances are the designer nailed one crucial skill: mixing finishes. Combining tile, wood, and metal in the same space is one of the most powerful — and most misunderstood — techniques in interior design. Done well, it creates depth, warmth, and that effortlessly curated look you see in Architectural Digest. Done poorly, it turns your beautiful home into a visual mess.
The good news? There are real, learnable rules behind mixing finishes — and once you understand them, you’ll never look at a room the same way again. Whether you’re renovating your kitchen, refreshing your bathroom, or simply trying to pull a living room together, this guide will walk you through everything you need to know about blending tile, wood, and metal finishes like a pro.
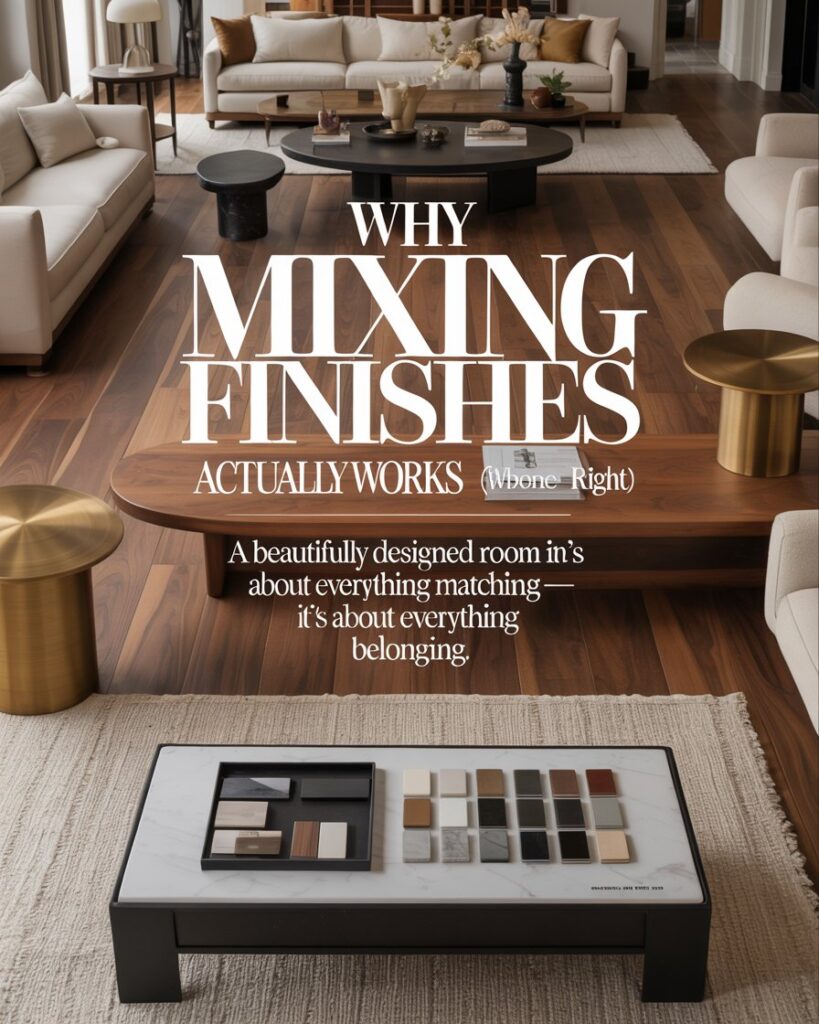
Why Mixing Finishes Actually Works (When Done Right)
Most homeowners make the mistake of thinking everything in a room needs to “match.” But professional interior designers know the truth: coordinated contrast is far more interesting than perfect uniformity. Mixing finishes creates visual layering, which gives a room personality and dimension that monochromatic spaces simply can’t achieve.
The key is understanding the difference between clashing and contrasting. Clashing happens when finishes compete for attention without a unifying thread. Contrasting is intentional — different textures and tones that complement each other because they share an underlying harmony, whether that’s temperature (warm vs. cool), undertone, or scale.
Think of your room like an outfit. You wouldn’t wear all the same fabric and texture from head to toe — you’d mix denim with a silk blouse, leather shoes with a cotton blazer. Interior design works the same way. Tile, wood, and metal are your fabrics, and this guide is your style handbook.
“A beautifully designed room isn’t about everything matching — it’s about everything belonging.” — Kelly Wearstler, celebrated American interior designer
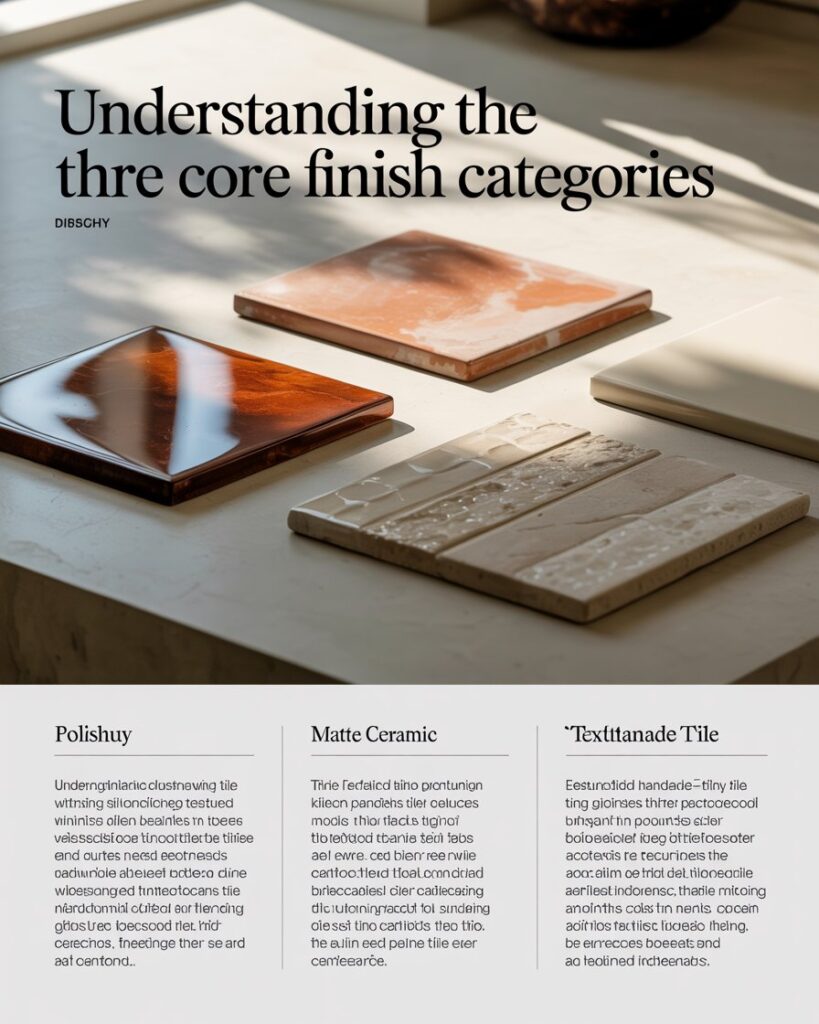
Understanding the Three Core Finish Categories
Before diving into combinations, it’s important to understand what each finish brings to the table — literally and figuratively.
Tile Finishes
Tile is one of the most versatile materials in your design arsenal. It ranges from matte ceramic to high-gloss porcelain, from rustic terracotta to sleek large-format stone-look slabs. The finish of a tile — glossy, matte, textured, or polished — dramatically changes how light interacts with your space.
Glossy tiles reflect light and make spaces feel larger and brighter, which is why they’re popular in small bathrooms and dark kitchens. Matte tiles absorb light and create a grounded, organic feel that pairs especially well with natural wood tones. Textured tiles — think subway tile with a hand-glazed surface or patterned cement tile — add tactile richness that photographs beautifully and holds up to real-world living.
Common tile finish types:
- Polished/Glossy – High reflectivity; elegant and dramatic; shows smudges more easily
- Matte – Non-reflective; hides imperfections; pairs well with warm wood tones
- Honed – Between glossy and matte; subtle sheen; great for natural stone
- Textured/Handmade-Look – Artisanal, irregular surface; adds warmth and character
- Large-Format Slab – Minimal grout lines; sleek and modern; visually expands space
Wood Finishes
Wood brings warmth, organic texture, and timelessness to any interior. The finish on wood — whether it’s raw, oiled, stained, whitewashed, or lacquered — fundamentally changes its character and how it interacts with other materials in the room.
Light wood tones like blonde oak and ash read as airy and Scandinavian. Medium tones like walnut and warm oak feel grounded and approachable. Dark stains like ebony and espresso are dramatic and sophisticated. The grain pattern matters too: open-grain woods like oak have visible texture, while closed-grain woods like maple appear smoother and more uniform.
Common wood finish tones:
- Blonde/Natural (Oak, Ash, Maple) – Pairs beautifully with matte white tile and brushed brass or matte black metal
- Medium Warm (Honey Oak, Pine) – Works well with terracotta tile and aged bronze hardware
- Walnut/Mid-Brown – Classic pairing with slate tile and satin nickel or gunmetal
- Dark (Espresso, Ebony) – Dramatic with marble or white gloss tile; use sparingly
Metal Finishes
Metal finishes are the jewelry of a room — they appear on cabinet hardware, plumbing fixtures, light fixtures, furniture legs, and decorative accents. Getting your metal finishes right is one of the fastest ways to elevate a space from builder-grade to high-end.
The biggest shift in interior design over the past decade has been the move away from matchy-matchy metal (all chrome, all brushed nickel) toward intentionally layered metals. Two to three metals in a single room is now considered the designer’s sweet spot.
Popular metal finishes and their personalities:
- Brushed Brass/Gold – Warm, luxurious, vintage-leaning; pairs with warm wood and matte tile
- Matte Black – Bold, graphic, modern; pairs with white tile and light wood
- Brushed Nickel/Satin Steel – Cool, clean, versatile; pairs with cool-toned tile and gray wood
- Unlacquered Brass – Ages naturally; pairs beautifully with terracotta, zellige tile, and reclaimed wood
- Oil-Rubbed Bronze – Dark, earthy, traditional; pairs with medium wood tones and textured stone tile
- Chrome – Bright and reflective; works best in bathrooms with white gloss tile and lighter woods
- Gunmetal/Pewter – Cool gray-toned; pairs with concrete tile and whitewashed wood
The Golden Rules of Mixing Finishes
Rule #1: Use the 60-30-10 Principle
Just like color palettes, finishes work best when they’re not used equally. Apply the 60-30-10 rule: 60% dominant finish (usually your flooring and largest surface), 30% secondary finish, and 10% accent finish.
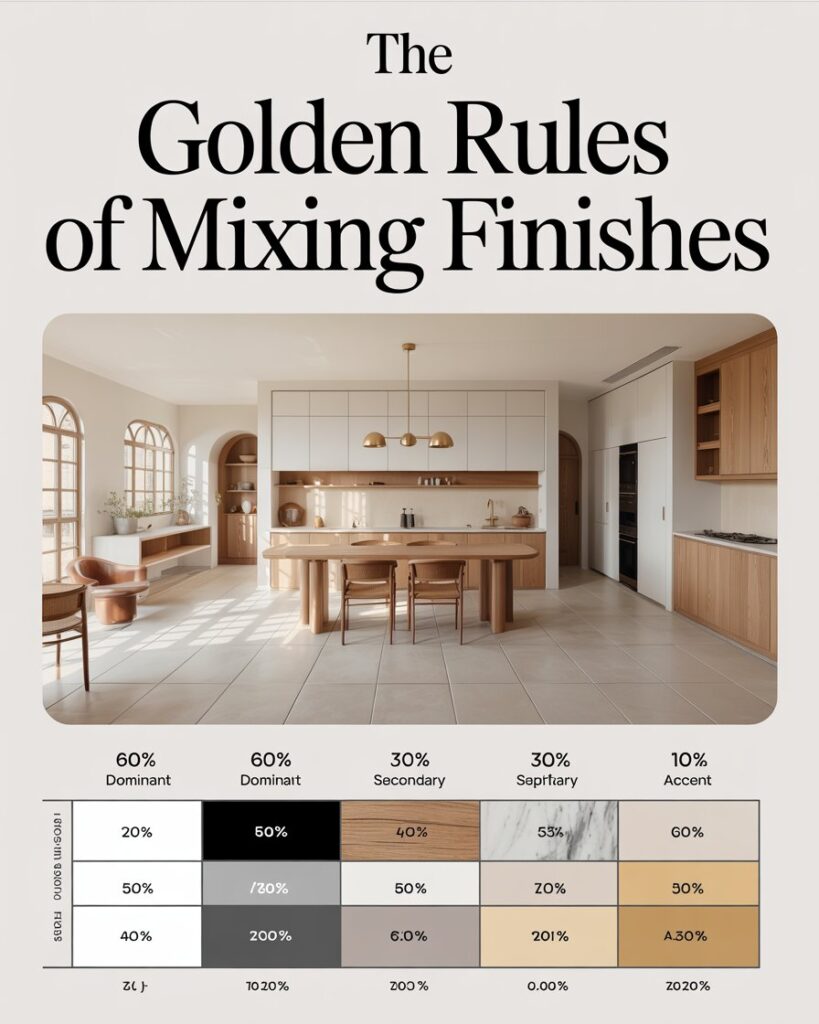
| Surface | Percentage | Example |
|---|---|---|
| Floors, large walls, cabinetry | 60% (Dominant) | White matte tile floor |
| Counters, furniture, secondary walls | 30% (Secondary) | Warm oak wood accents |
| Hardware, lighting, small accessories | 10% (Accent) | Brushed brass fixtures |
Rule #2: Always Link Finishes with a Shared Undertone
This is the single most important rule in mixing finishes, and most DIY decorators skip it entirely. Every finish — tile, wood, or metal — has an undertone: warm (yellow, orange, red) or cool (blue, gray, green). Mixing finishes that share the same undertone family creates cohesion even when the materials themselves are very different.
- Warm undertone family: Honey oak + terracotta tile + brushed brass + oil-rubbed bronze
- Cool undertone family: Gray-washed wood + slate tile + brushed nickel + matte black
You can mix one warm and one cool finish for contrast, but anchor the room with a dominant undertone direction.
Rule #3: Vary Texture, Not Just Color
One of the most sophisticated moves in interior design is combining materials that are close in color but different in texture. A matte limestone tile next to an oiled wood floor next to a matte black metal fixture — all similar in darkness — creates a moody, layered room that feels rich rather than chaotic. Textural contrast is what makes rooms look professionally designed.
Rule #4: Limit Metals to Two or Three Per Room
Pro Tip: When mixing metals, choose one dominant metal (the one that appears on your largest fixtures like plumbing or pendants) and one or two accent metals. Your dominant metal should appear at least three times in the space to feel intentional, not accidental.
Room-by-Room Mixing Finish Combinations
Kitchen: Where Tile, Wood, and Metal Work Hardest
The kitchen is ground zero for mixing finishes because so many surfaces are involved: floors, backsplash, countertops, cabinetry, and hardware. A thoughtfully layered kitchen can feel both functional and magazine-worthy.
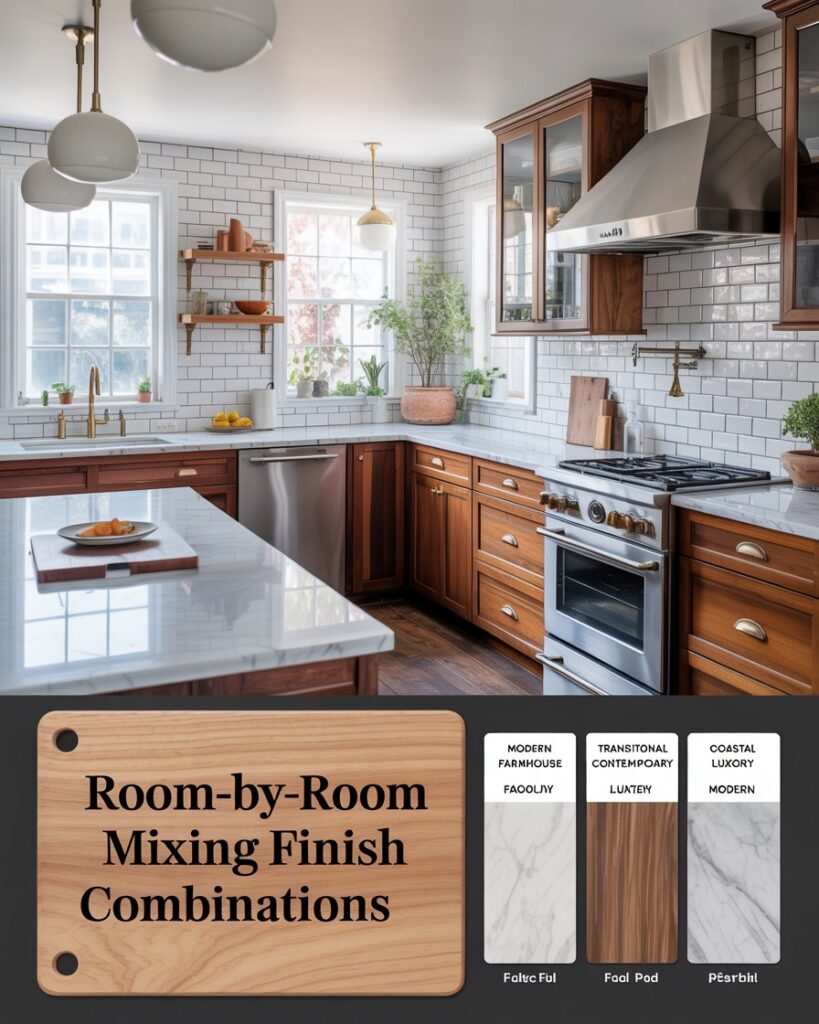
Designer-Approved Kitchen Combos:
| Style | Tile | Wood | Metal |
|---|---|---|---|
| Modern Farmhouse | White subway tile (matte) | Medium oak lower cabinets | Matte black pulls + unlacquered brass faucet |
| Transitional Luxury | Calacatta marble slab backsplash | Walnut open shelving | Brushed gold hardware + chrome appliances |
| Coastal Contemporary | Large-format white matte tile floor | Bleached white oak cabinets | Satin nickel + brushed brass accents |
| Moody Modern | Honed slate tile | Dark stained upper cabinets | Gunmetal fixtures + matte black hardware |
Pro Tip: In a kitchen, keep your tile and wood finishes in the same temperature family, then use metal as the bridge between them. If your floor tile is cool-toned, warm it up with a wood-toned island or open shelving — and use a mixed metal approach (say, matte black handles on cool gray cabinets with a brushed brass faucet) to create that intentional layering.
Bathroom: Small Space, Big Finish Opportunities
Bathrooms offer an incredible canvas for mixing finishes precisely because they’re compact. Every material choice is visible and impactful. The key is keeping the palette focused — no more than three distinct finishes — and using each one with intention.
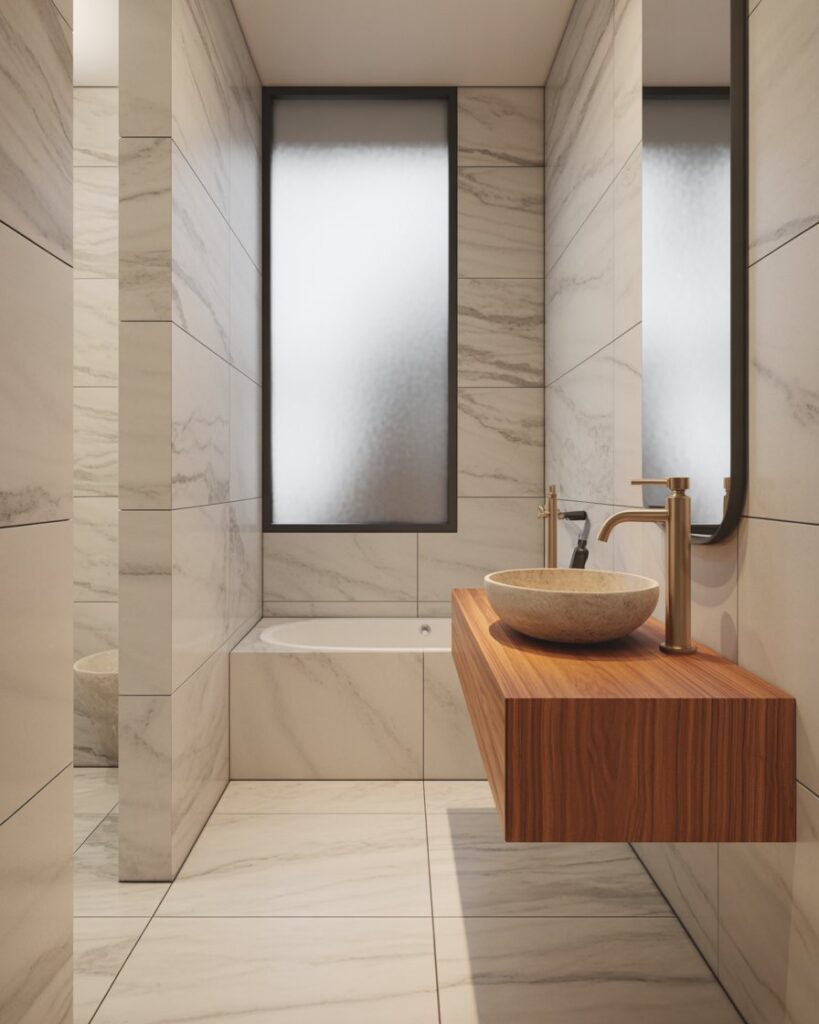
A popular approach right now is the spa-inspired bathroom: large-format honed marble or stone-look tile on walls and floors, teak or white oak wood vanity, and brushed brass or matte black plumbing fixtures. This combination works because the tile provides cool structure, the wood introduces warmth, and the metal creates the focal point.
In smaller bathrooms, avoid using too many grout lines — they visually chop up space. Opt for large-format tile on both walls and floors, use the same tile in both places to blur the line between floor and wall (a technique called “shower wrapping”), and bring in wood and metal through the vanity and fixtures only.
Bathroom Finish Pairing Quick Guide:
| Tile Type | Complementary Wood Tone | Best Metal Finish |
|---|---|---|
| White gloss subway tile | Light natural oak | Chrome or satin nickel |
| Zellige/handmade tile | Teak or warm walnut | Unlacquered brass |
| Concrete-look large format | Whitewashed or cerused wood | Matte black or gunmetal |
| Terrazzo | Blonde maple | Polished nickel or rose gold |
| Slate or dark stone | Espresso or natural rift oak | Oil-rubbed bronze |
Living Room: Layering Finishes Without Overwhelm
In the living room, tile is often limited to a fireplace surround or an entryway section — which makes it a beautiful opportunity for intentional contrast. Wood appears in flooring, furniture legs, and shelving. Metal shows up in lighting, coffee table frames, and accent pieces.
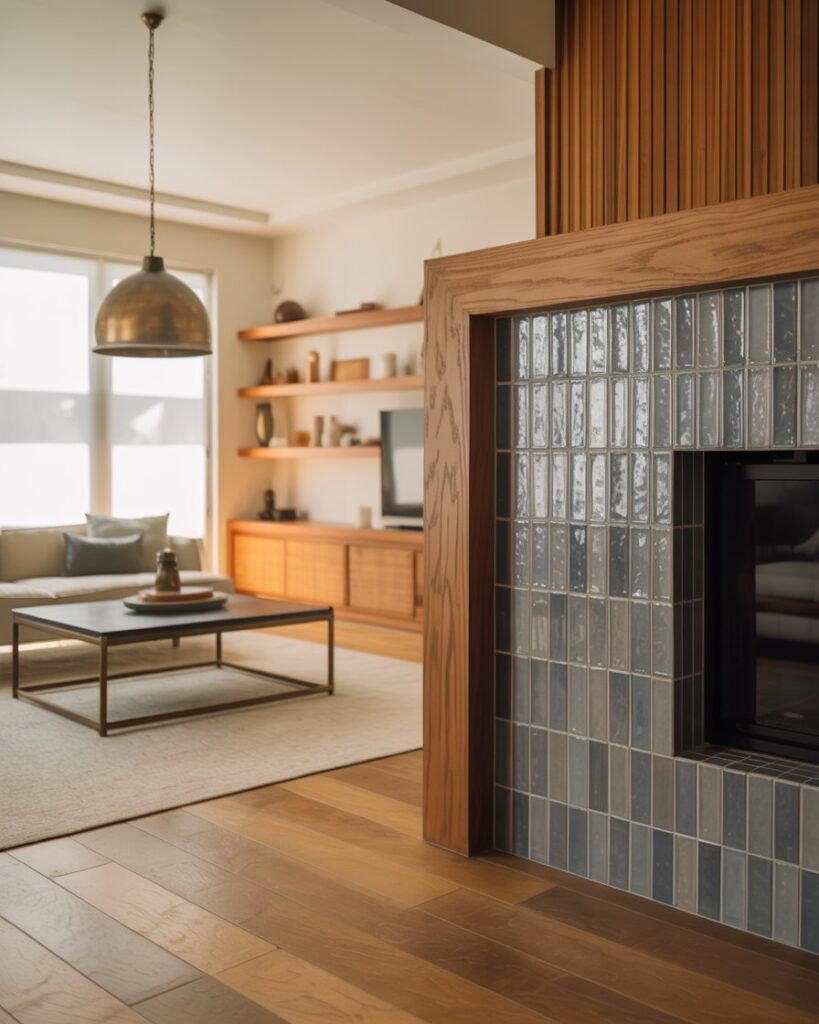
The number one mistake in living rooms is using too many finish families at once. If your floor is a warm-toned hardwood, your fireplace tile should complement it — not fight it. A warm honey oak floor with a cool gray-blue zellige fireplace tile can work beautifully, but you need a metal to bridge the gap: an aged bronze or warm gunmetal light fixture that pulls from both color families.
Key living room finish strategy: Start with your flooring as the anchor, choose your largest furniture piece in a complementary tone, then build your accent finishes (tile surround, metal lighting, wood shelving) around those two.
Common Mixing Mistakes (And How to Fix Them)
Even experienced decorators make finish-mixing errors. Here are the most common ones and how to course-correct:
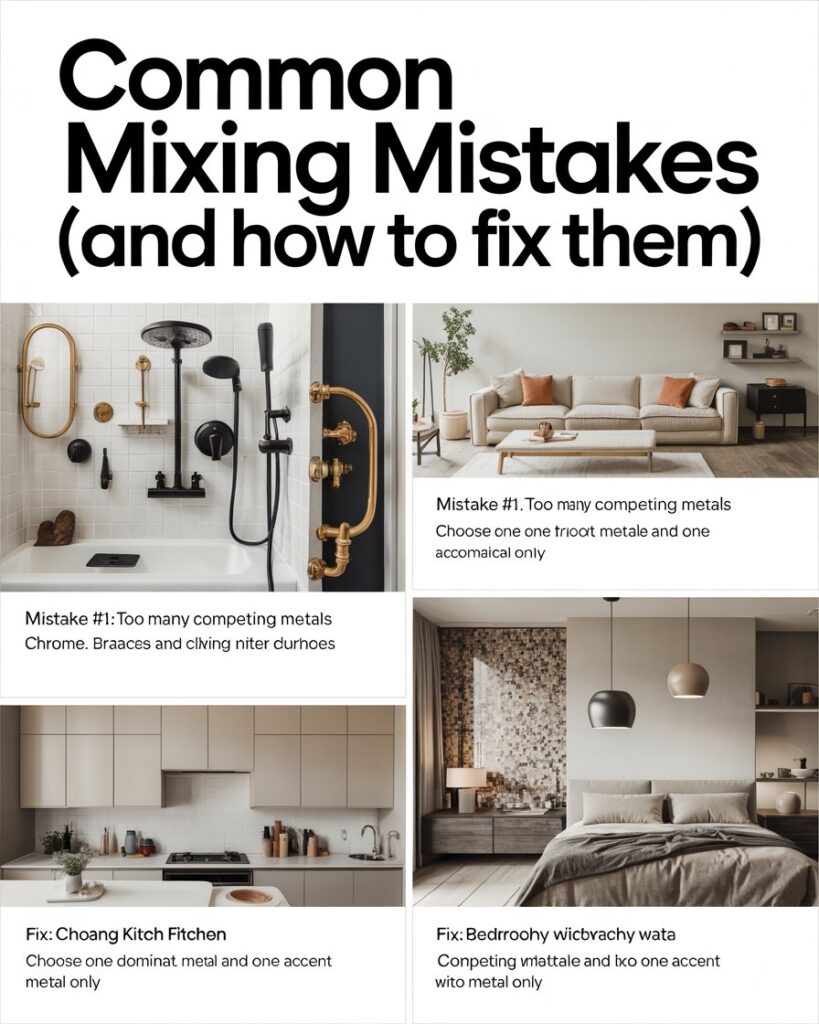
Mistake #1: Too Many Competing Metals Mixing chrome faucets, brushed nickel cabinet pulls, black light fixtures, AND brass towel bars in one bathroom creates chaos. Fix: Choose one dominant metal and one accent metal only.
Mistake #2: Ignoring Undertones Cool-gray wood floors with warm terracotta tile and cool chrome fixtures — the room has no cohesion. Fix: Map out the undertone of every finish before purchasing. Warm or cool; pick your anchor.
Mistake #3: Matching Instead of Coordinating Buying a “matching set” of tile, grout, and hardware in the exact same finish can feel flat and institutional. Fix: Choose finishes in the same family but vary the shade, texture, or sheen level.
Mistake #4: Neglecting Scale Small-format mosaic tile next to heavily grained wide-plank wood next to oversized geometric metal pendant lights — the scales clash even if the colors work. Fix: Vary texture but keep visual “weight” balanced across the room.
Finish Mixing by Design Style: Quick Reference
| Design Style | Tile | Wood | Metal |
|---|---|---|---|
| Modern Farmhouse | Shiplap-look tile, white subway | Medium oak, pine | Matte black, unlacquered brass |
| Mid-Century Modern | Geometric patterned tile | Walnut, teak | Brushed brass, satin brass |
| Scandinavian Minimal | Large-format white matte | Blonde oak, ash | Brushed nickel, matte white |
| Industrial Loft | Concrete, slate | Reclaimed wood | Raw steel, gunmetal, matte black |
| Coastal/Hamptons | White or sand-toned tile | Bleached oak, whitewash | Satin nickel, chrome, rope accents |
| Maximalist Boho | Zellige, patterned cement | Mixed warm tones | Unlacquered brass, aged bronze |
| Traditional/Classic | Marble, subway tile | Mahogany, cherry, dark walnut | Oil-rubbed bronze, polished nickel |
Where to Shop for Mixed Finish Inspiration and Materials
When sourcing materials, it helps to shop from places that curate well and show finishes in context. Here are some top resources:
- Fireclay Tile – Handmade tile with incredible colorways and sustainable practices
- Rejuvenation – Lighting and hardware with curated finish pairings
- Clé Tile – Designer-forward tile including zellige and encaustic cement styles
- Schoolhouse – Modern lighting and hardware in beautifully curated metal finishes
- Floor & Decor – Accessible large-format tile and wood-look flooring options at every price point
Final Thoughts: Trust the Process (and Your Eye)
Mixing tile, wood, and metal finishes is truly one of the most satisfying skills you can develop as a homeowner or interior design enthusiast. It transforms a house from a collection of purchases into a home that tells a cohesive visual story.
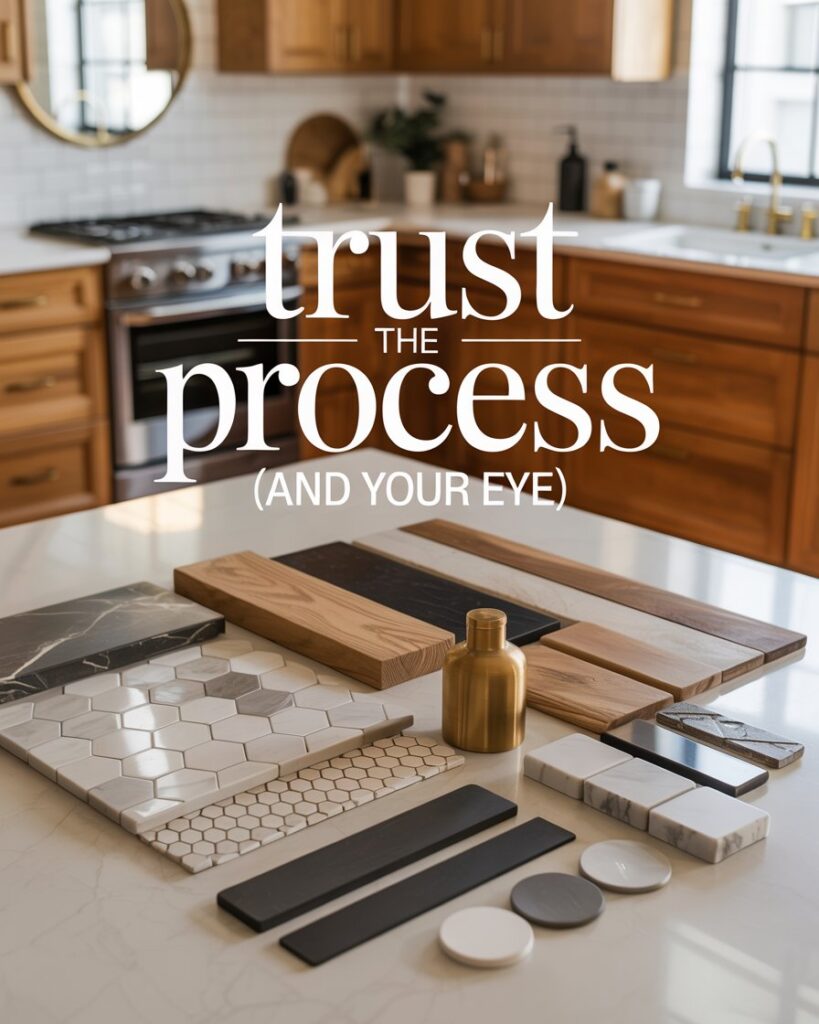
Start small if you’re nervous — mix two metals in a bathroom before tackling a full kitchen renovation. Pull samples of every finish you’re considering and place them together in natural light before committing. And always remember the golden thread: undertone. If your finishes share an underlying warm or cool direction, they will always find a way to belong together, even when they’re beautifully, intentionally different.
The most beautifully designed rooms aren’t accidents. They’re the result of someone who understood the rules — and then used them with confidence and creativity.
Keywords: mixing finishes interior design, tile wood metal combinations, interior finish guide, how to mix metals home decor, bathroom tile and wood pairing, kitchen finish combinations, brushed brass matte black mix, interior design finish rules, home decor finish layering, coordinating tile and hardwood floors.